Automated Version Control
Figure 1
Image 1 of 1: ‘Comic: a PhD student sends "FINAL.doc" to their supervisor, but after several increasingly intense and frustrating rounds of comments and revisions they end up with a file named "FINAL_rev.22.comments49.corrections.10.#@$%WHYDIDCOMETOGRADSCHOOL????.doc"’
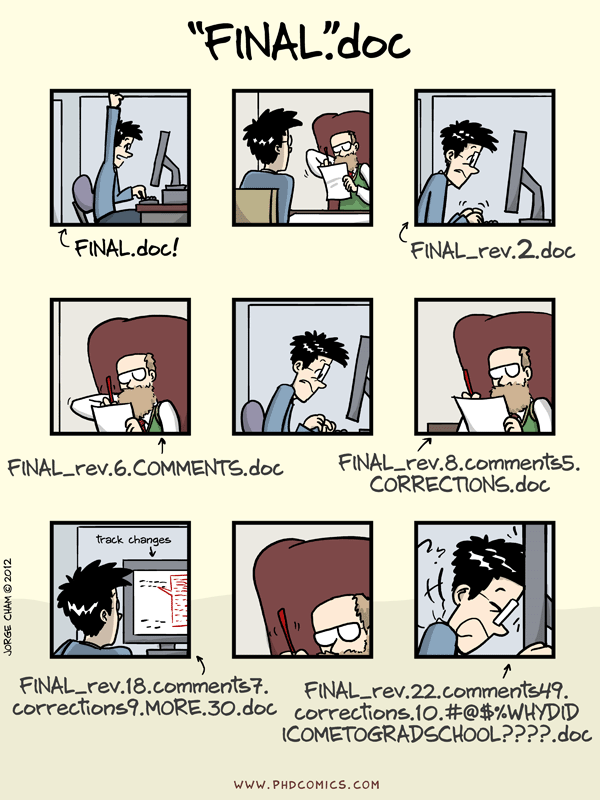
Figure 2
Image 1 of 1: ‘A diagram demonstrating how a single document grows as the result of sequential changes’

Figure 3
Image 1 of 1: ‘A diagram with one source document that has been modified in two different ways to produce two different versions of the document’

Figure 4
Image 1 of 1: ‘A diagram that shows the merging of two different document versions into one document that contains all of the changes from both versions’

Setting Up Git
Creating a Repository
Branches
Tracking Changes
Figure 1
Image 1 of 1: ‘A diagram showing how "git add" registers changes in the staging area, while "git commit" moves changes from the staging area to the repository’

Figure 2
Image 1 of 1: ‘A diagram showing two documents being separately staged using git add, before being combined into one commit using git commit’

Exploring History
Reverting Changes
Figure 1
Image 1 of 1: ‘A diagram showing how git restore can be used to restore the previous version of two files’

Ignoring Things
Break
Remotes in GitHub
Figure 1
Image 1 of 1: ‘The first step in creating a repository on GitHub: clicking the "create new" button’

Figure 2
Image 1 of 1: ‘The second step in creating a repository on GitHub: filling out the new repository form to provide the repository name, and specify that neither a readme nor a license should be created’
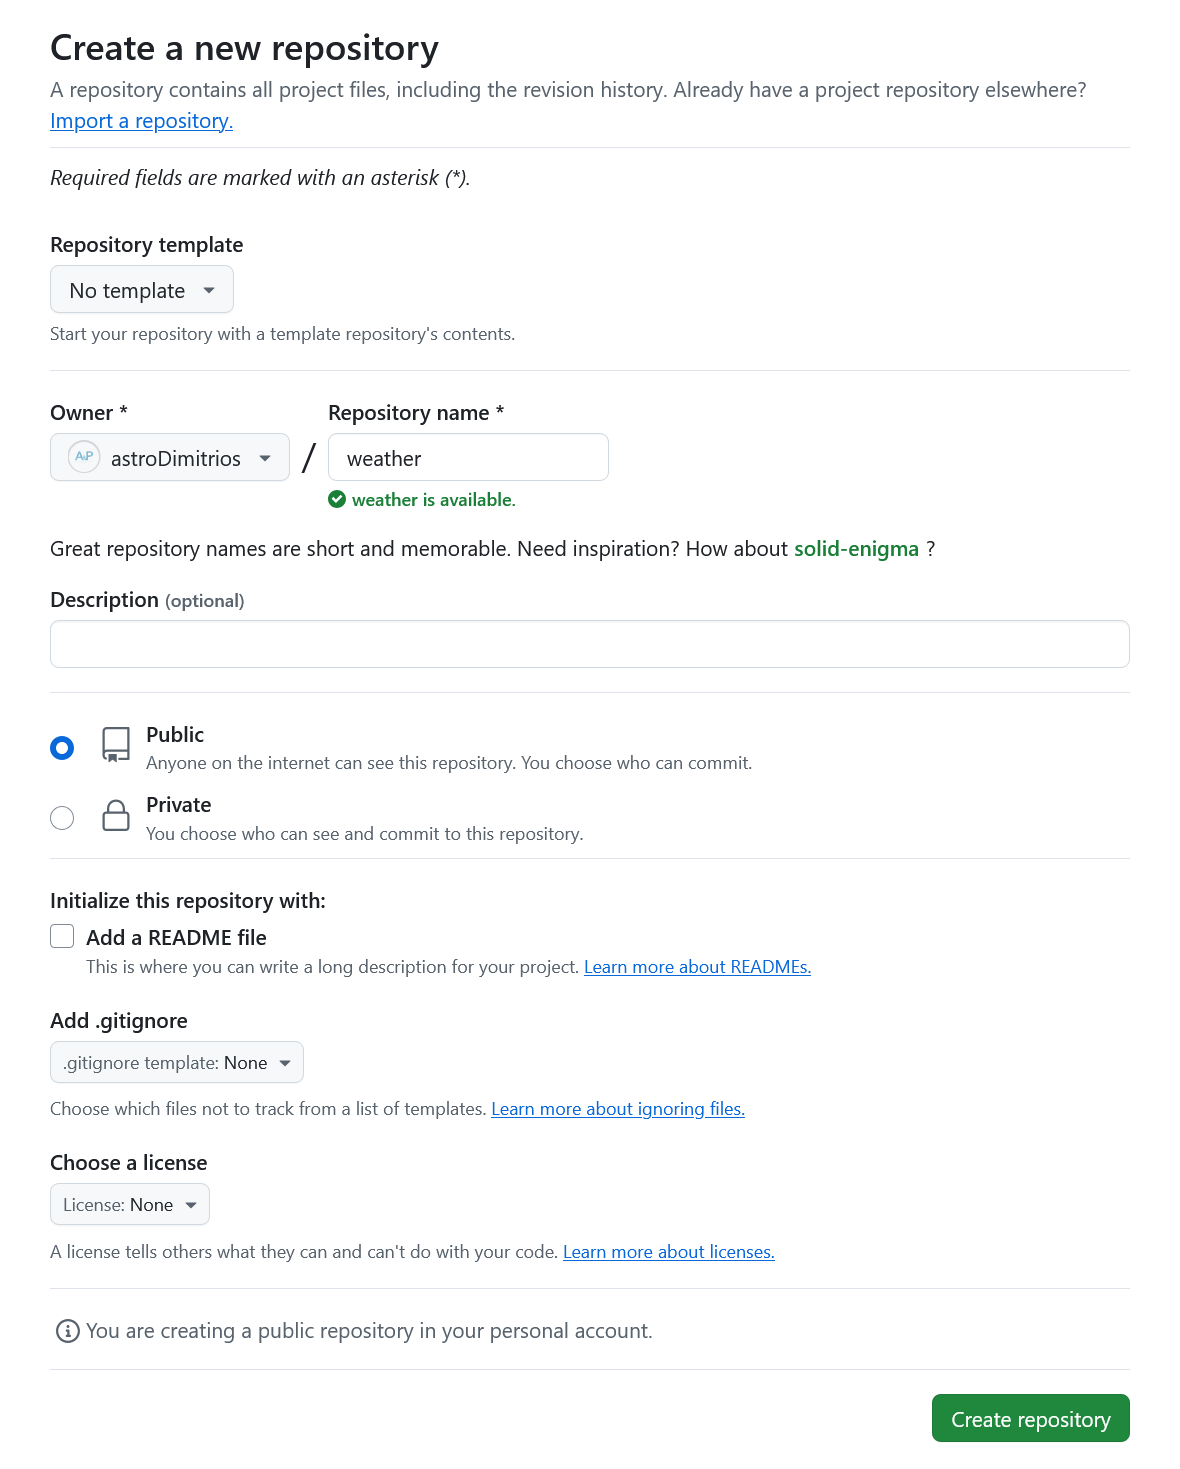
Figure 3
Image 1 of 1: ‘The summary page displayed by GitHub after a new repository has been created. It contains instructions for configuring the new GitHub repository as a Git remote’
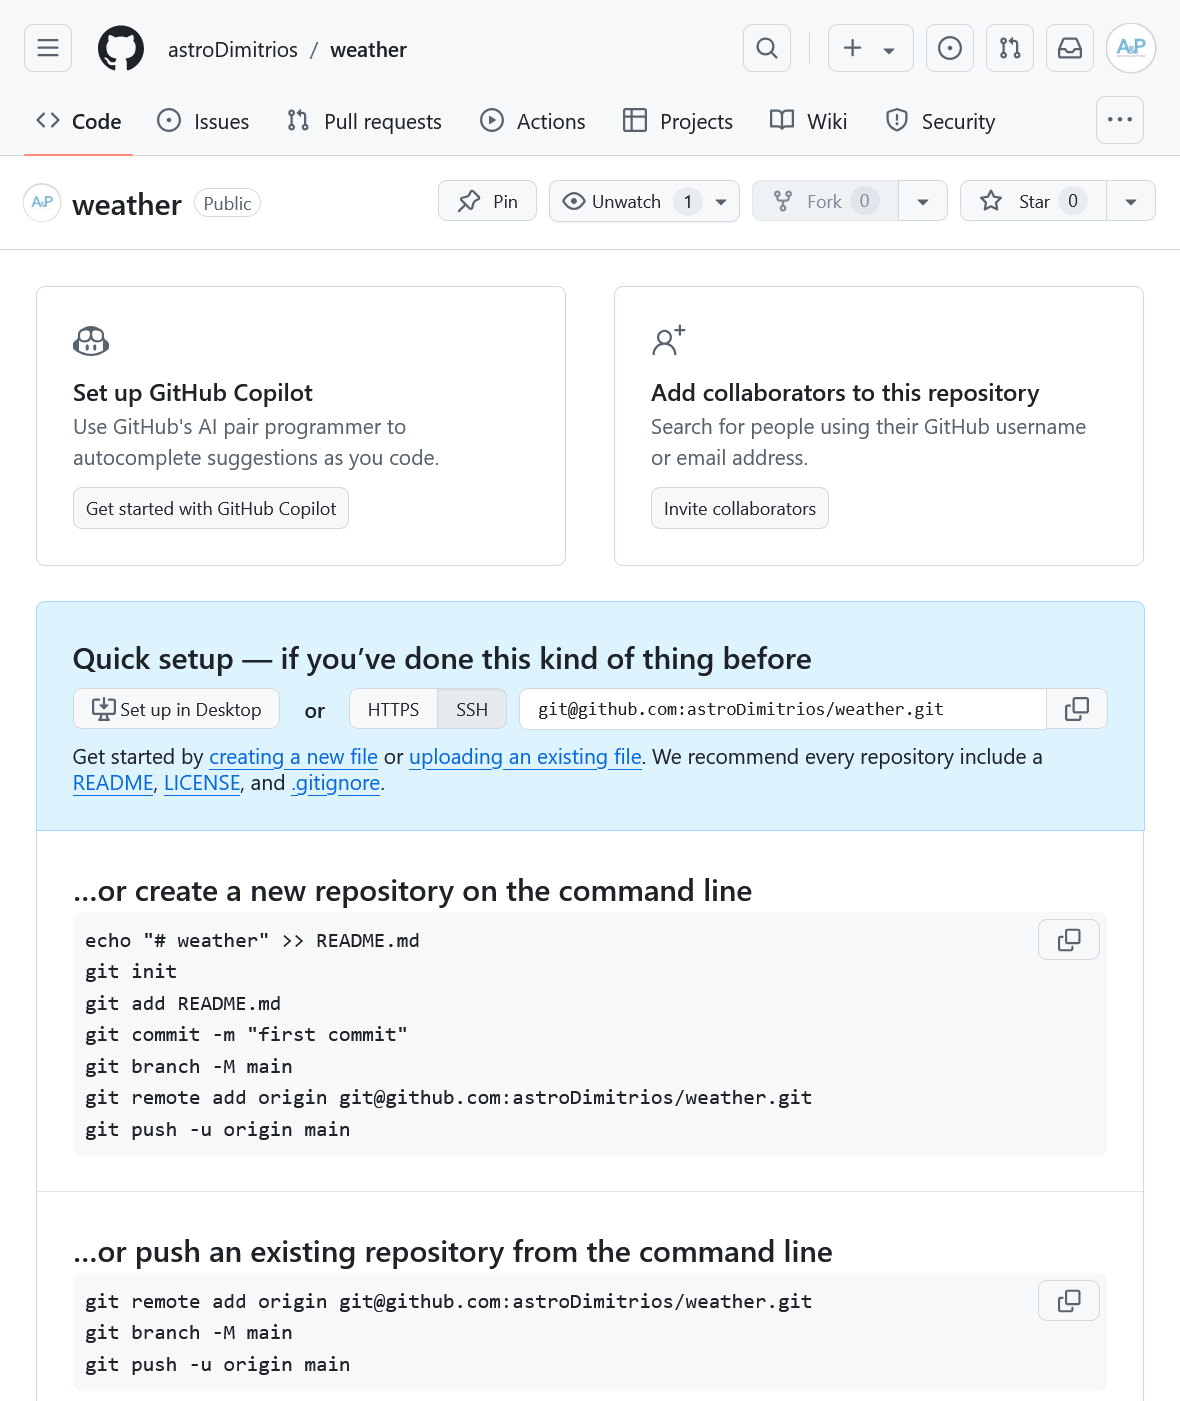
Figure 4
Image 1 of 1: ‘A diagram showing how "git add" registers changes in the staging area, while "git commit" moves changes from the staging area to the repository’
Figure 5
Image 1 of 1: ‘A diagram illustrating how the GitHub "weather" repository is also a Git repository like our local repository, but that it is currently empty’

Figure 6
Image 1 of 1: ‘A screenshot showing that clicking on "SSH" will make GitHub provide the SSH URL for a repository instead of the HTTPS URL’
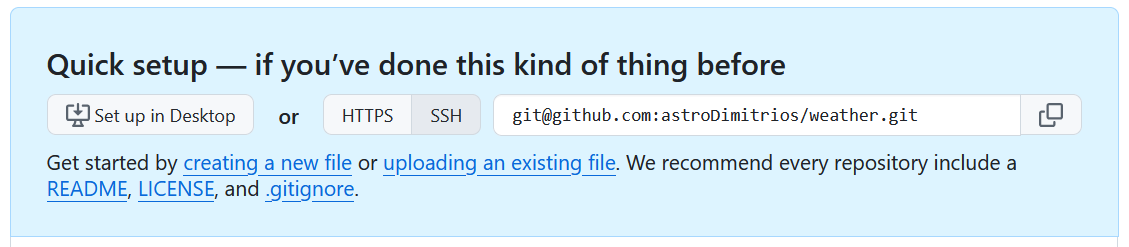
Figure 7
Image 1 of 1: ‘A diagram showing how "git push origin" will push changes from the local repository to the remote, making the remote repository an exact copy of the local repository.’

Exploring GitHub
Figure 1
Image 1 of 1: ‘The GitHub home page showing repositories on the left, and news in the centre.’
Figure 2
Image 1 of 1: ‘A screenshot of the GitHub repository for the git-novice lesson.’
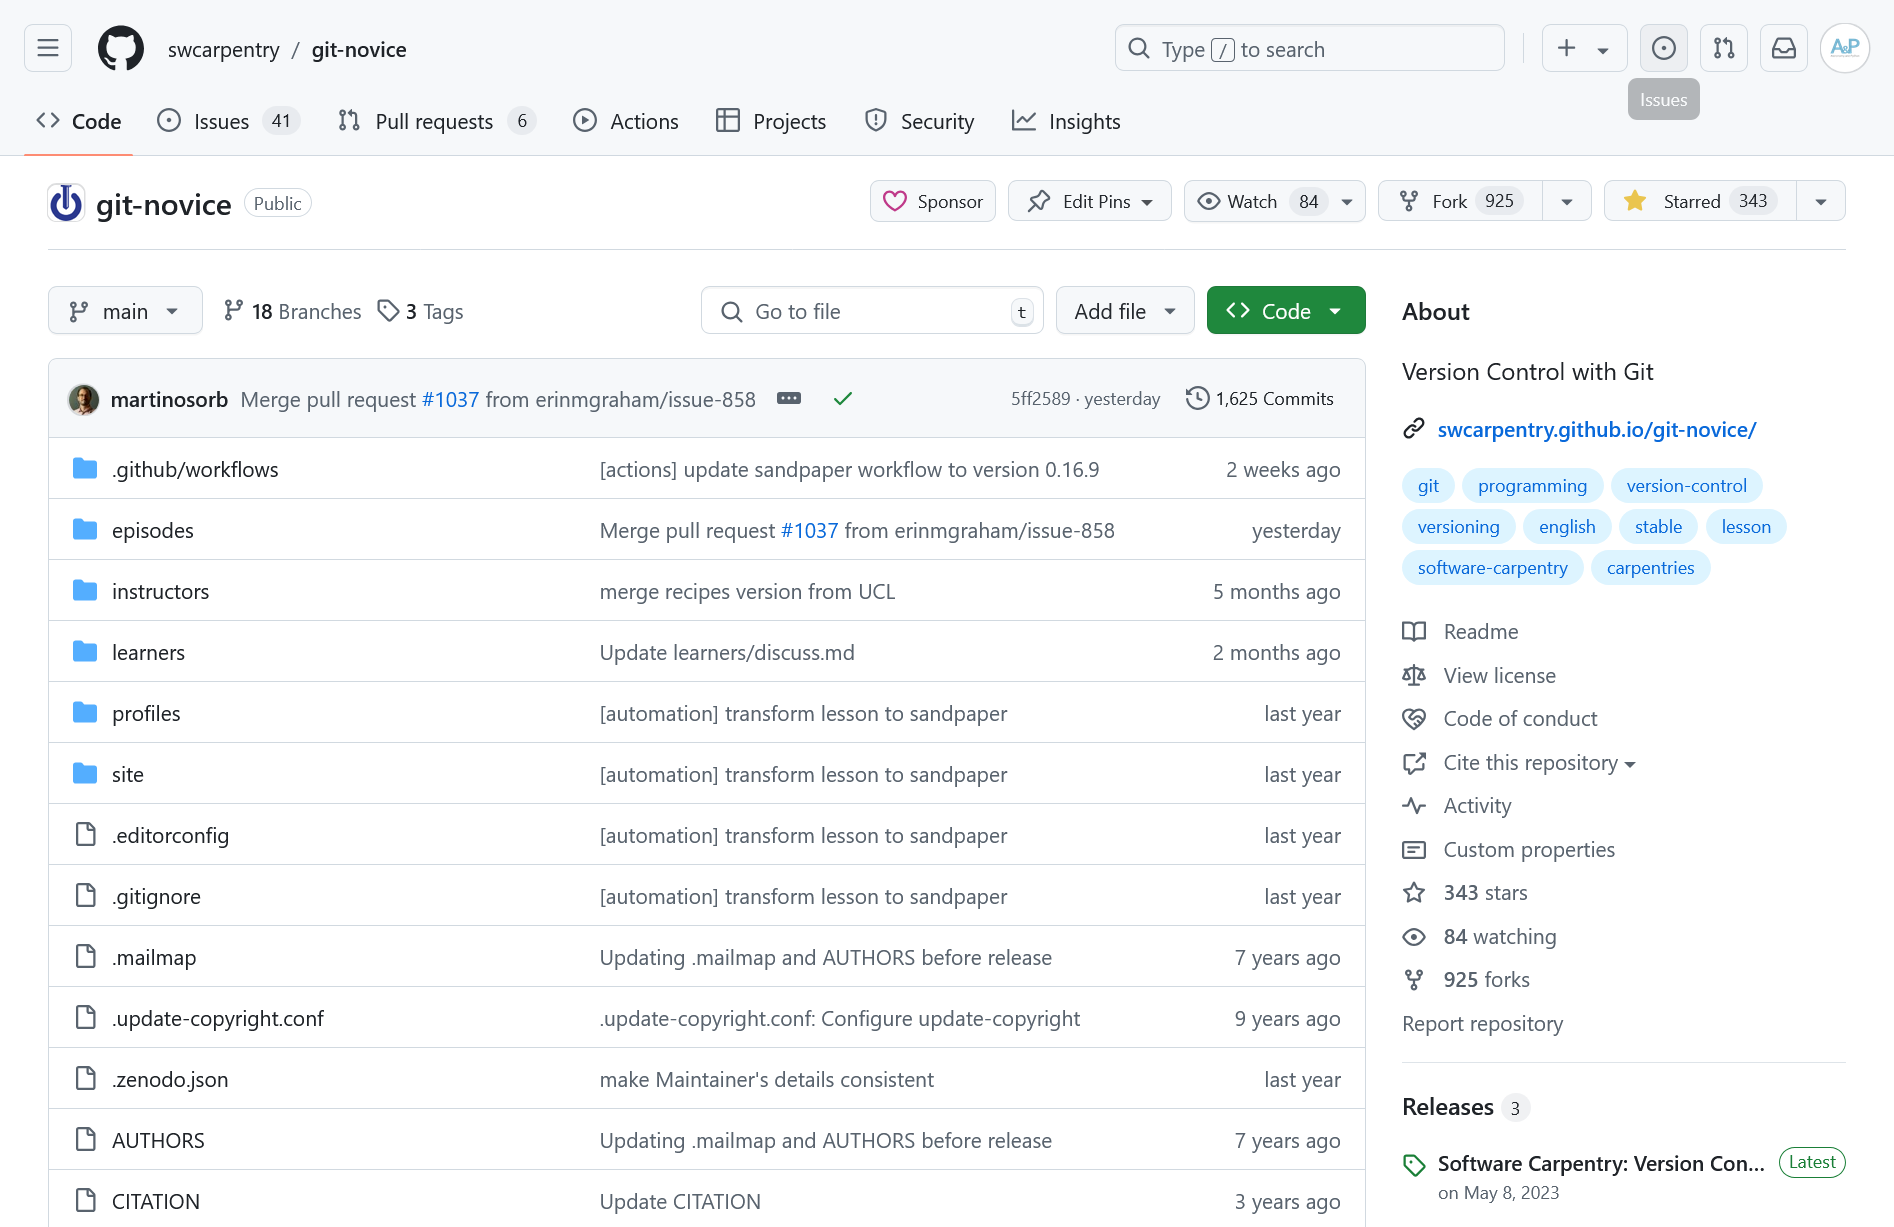
Figure 3
Image 1 of 1: ‘The GitHub nav at the top of a repository.’

Figure 4
Image 1 of 1: ‘The GitHub navigation tabs for a repository.’

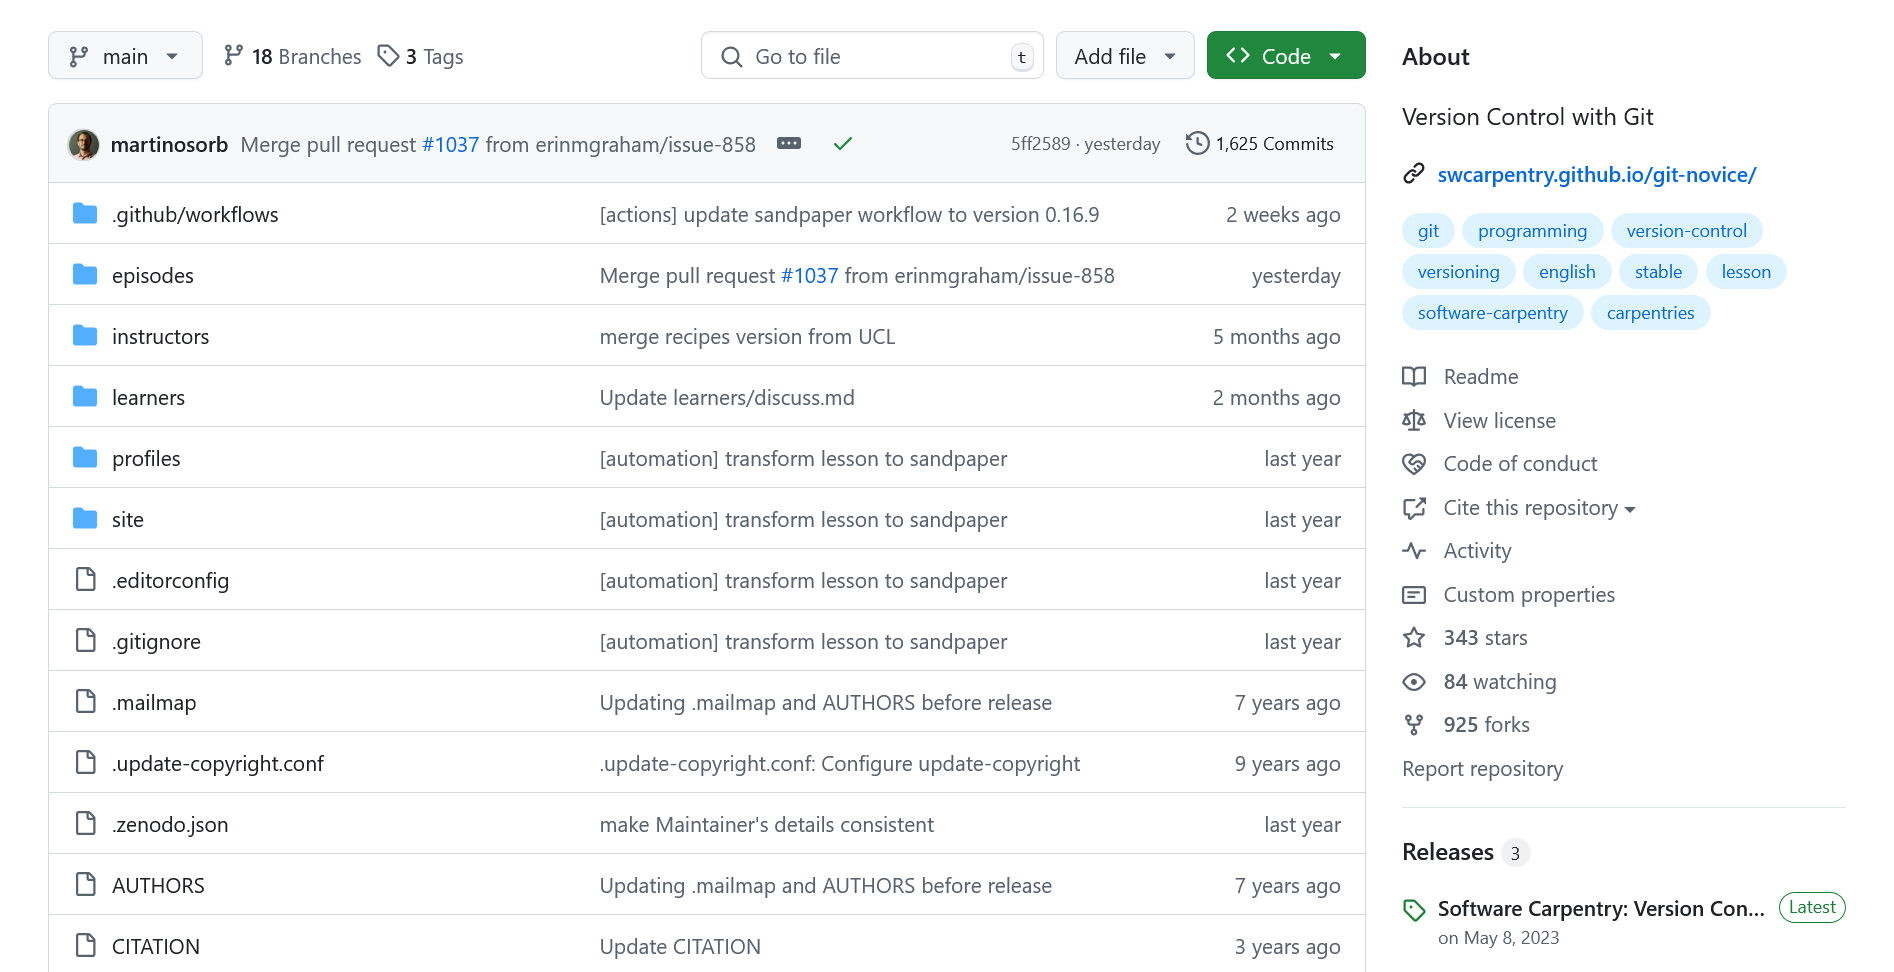
Figure 5
Image 1 of 1: ‘A screenshot of the lower section of the repository interface.’
Exploring History on GitHub
Figure 1
Image 1 of 1: ‘A screenshot of the main branch of weather repository on GitHub.’
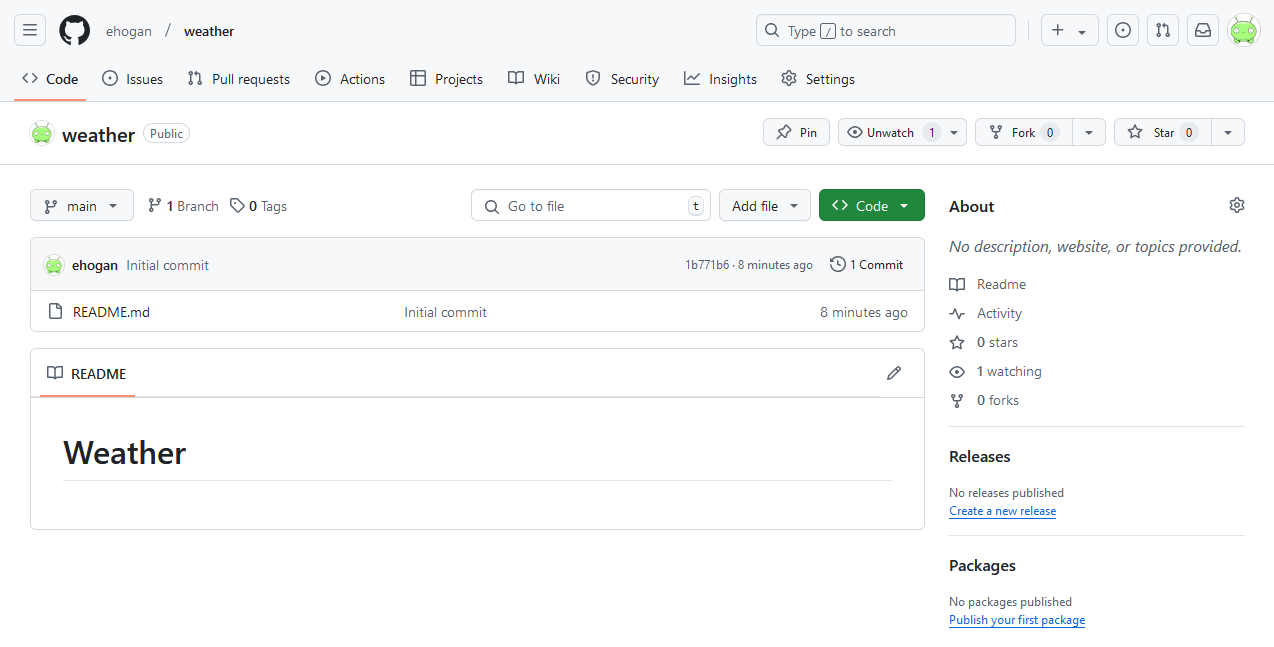
Figure 2
Image 1 of 1: ‘A screenshot of the main branch of weather repository on GitHub, showing the branch drop down box.’
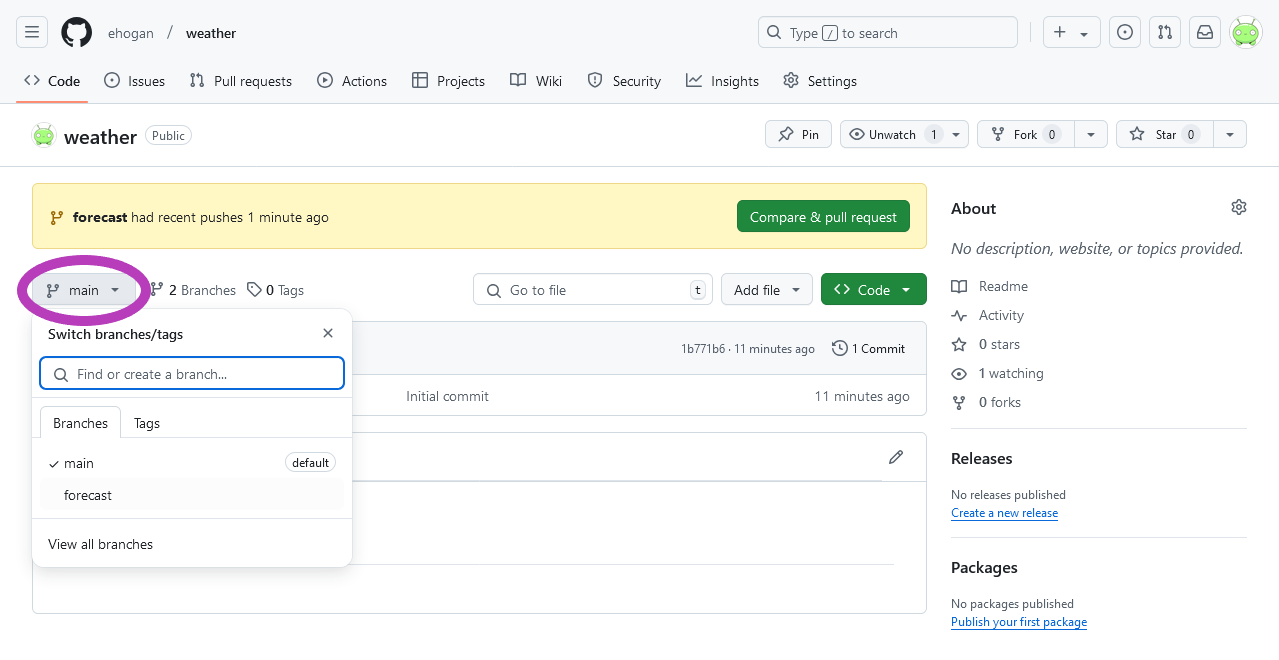
Figure 3
Image 1 of 1: ‘A screenshot of the forecast branch of weather repository on GitHub, showing how to navigate to the commits.’
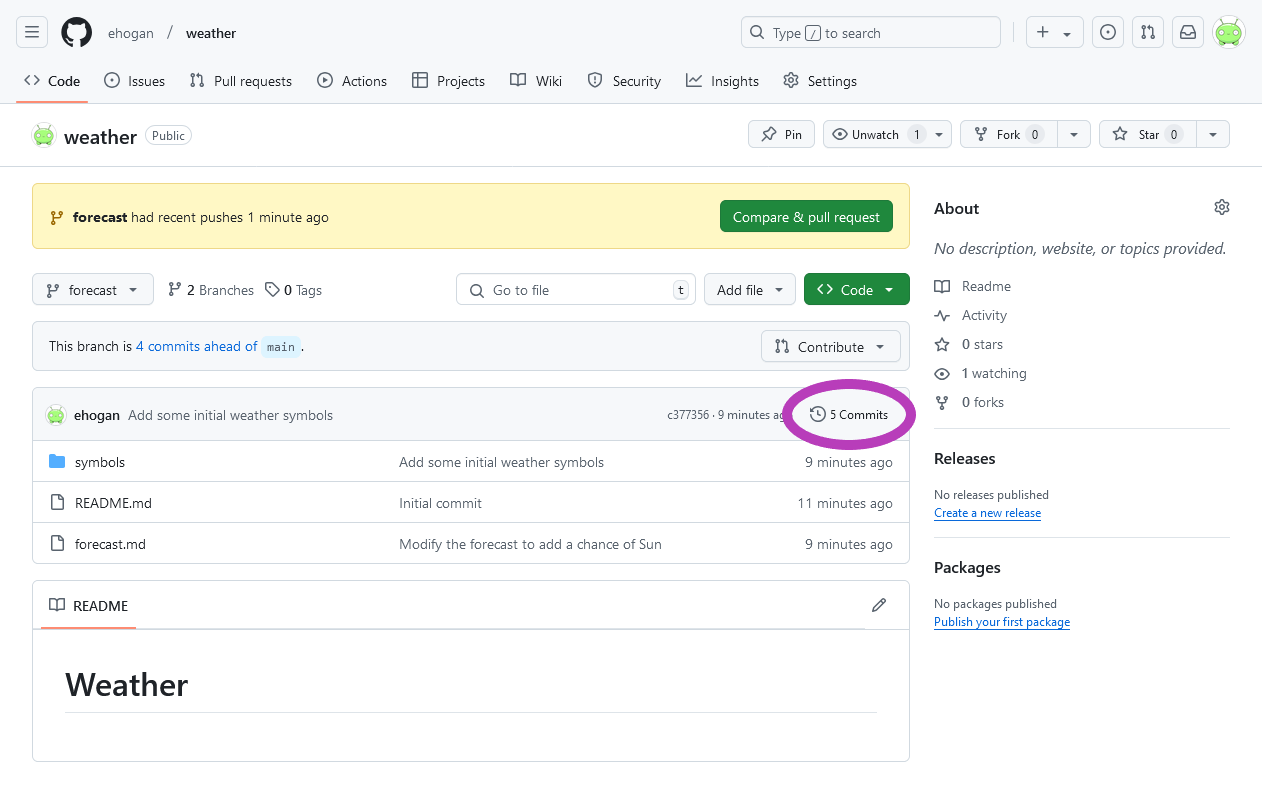
Figure 4
Image 1 of 1: ‘A screenshot of the commit on the forecast branch of the weather repository on GitHub.’
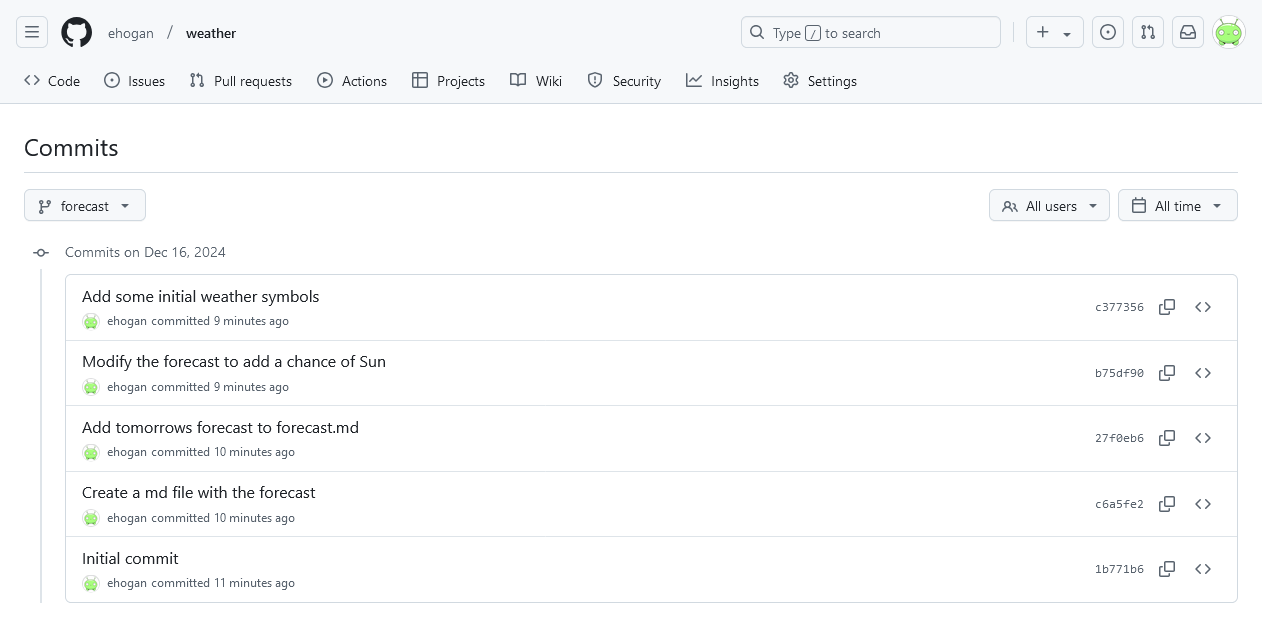
Figure 5
Image 1 of 1: ‘A screenshot of the compare page for the weather repository on GitHub.’
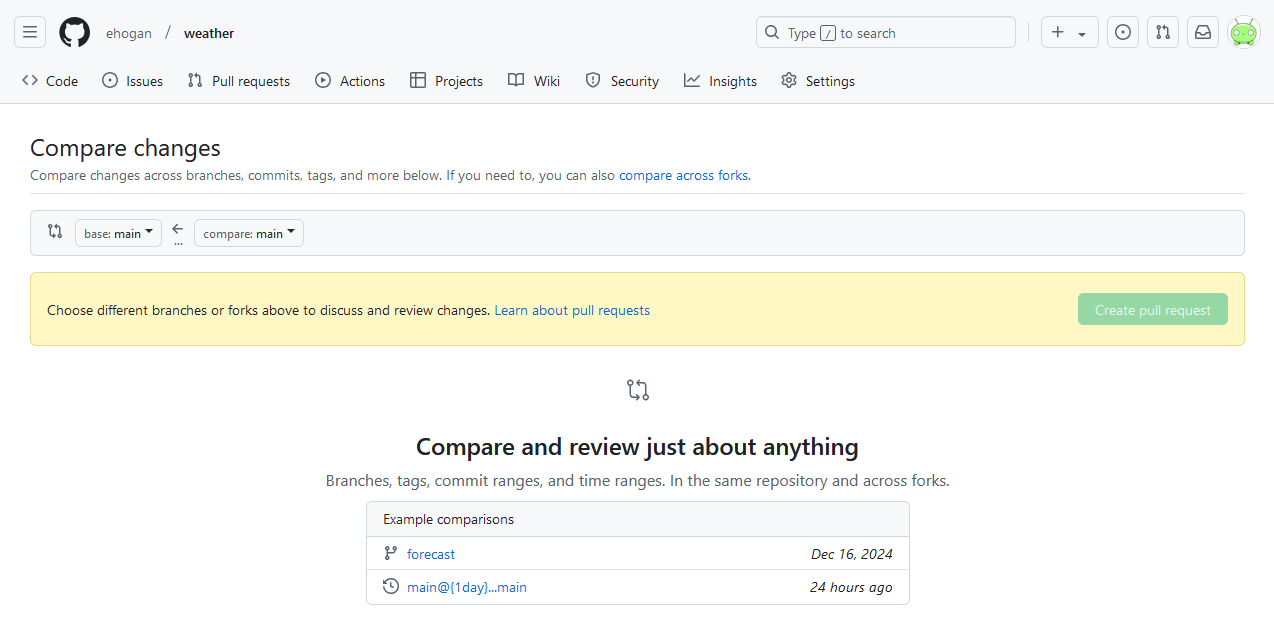
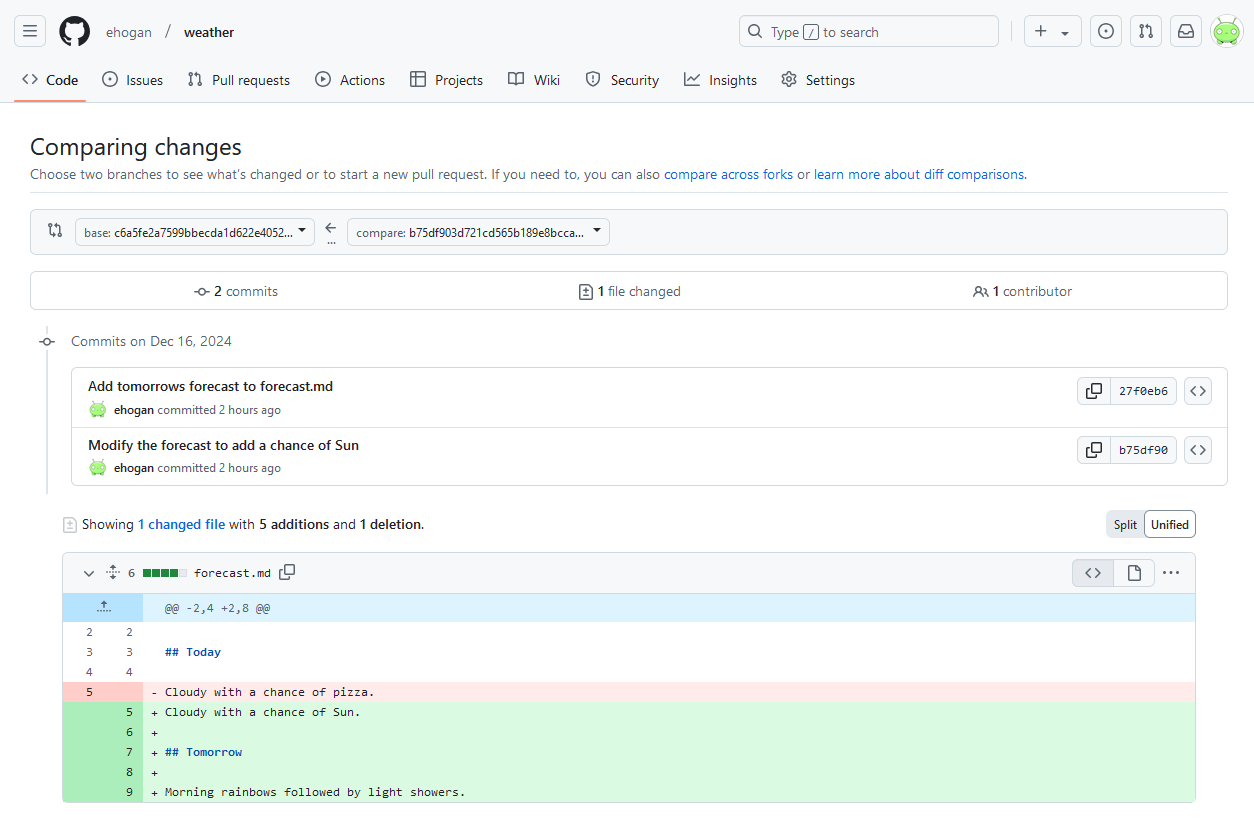
Figure 6
Image 1 of 1: ‘A screenshot showing the differences between two Git commit SHAs from the weather repository on GitHub.’
 `
`
Pull Requests
Figure 1
Image 1 of 1: ‘A screenshot of the weather repo showing the notification prompting us to Compare & pull request for the forecast branch.’

Figure 2
Image 1 of 1: ‘A screenshot of the weather repo showing the creation of a pull request for the forecast branch changes.’
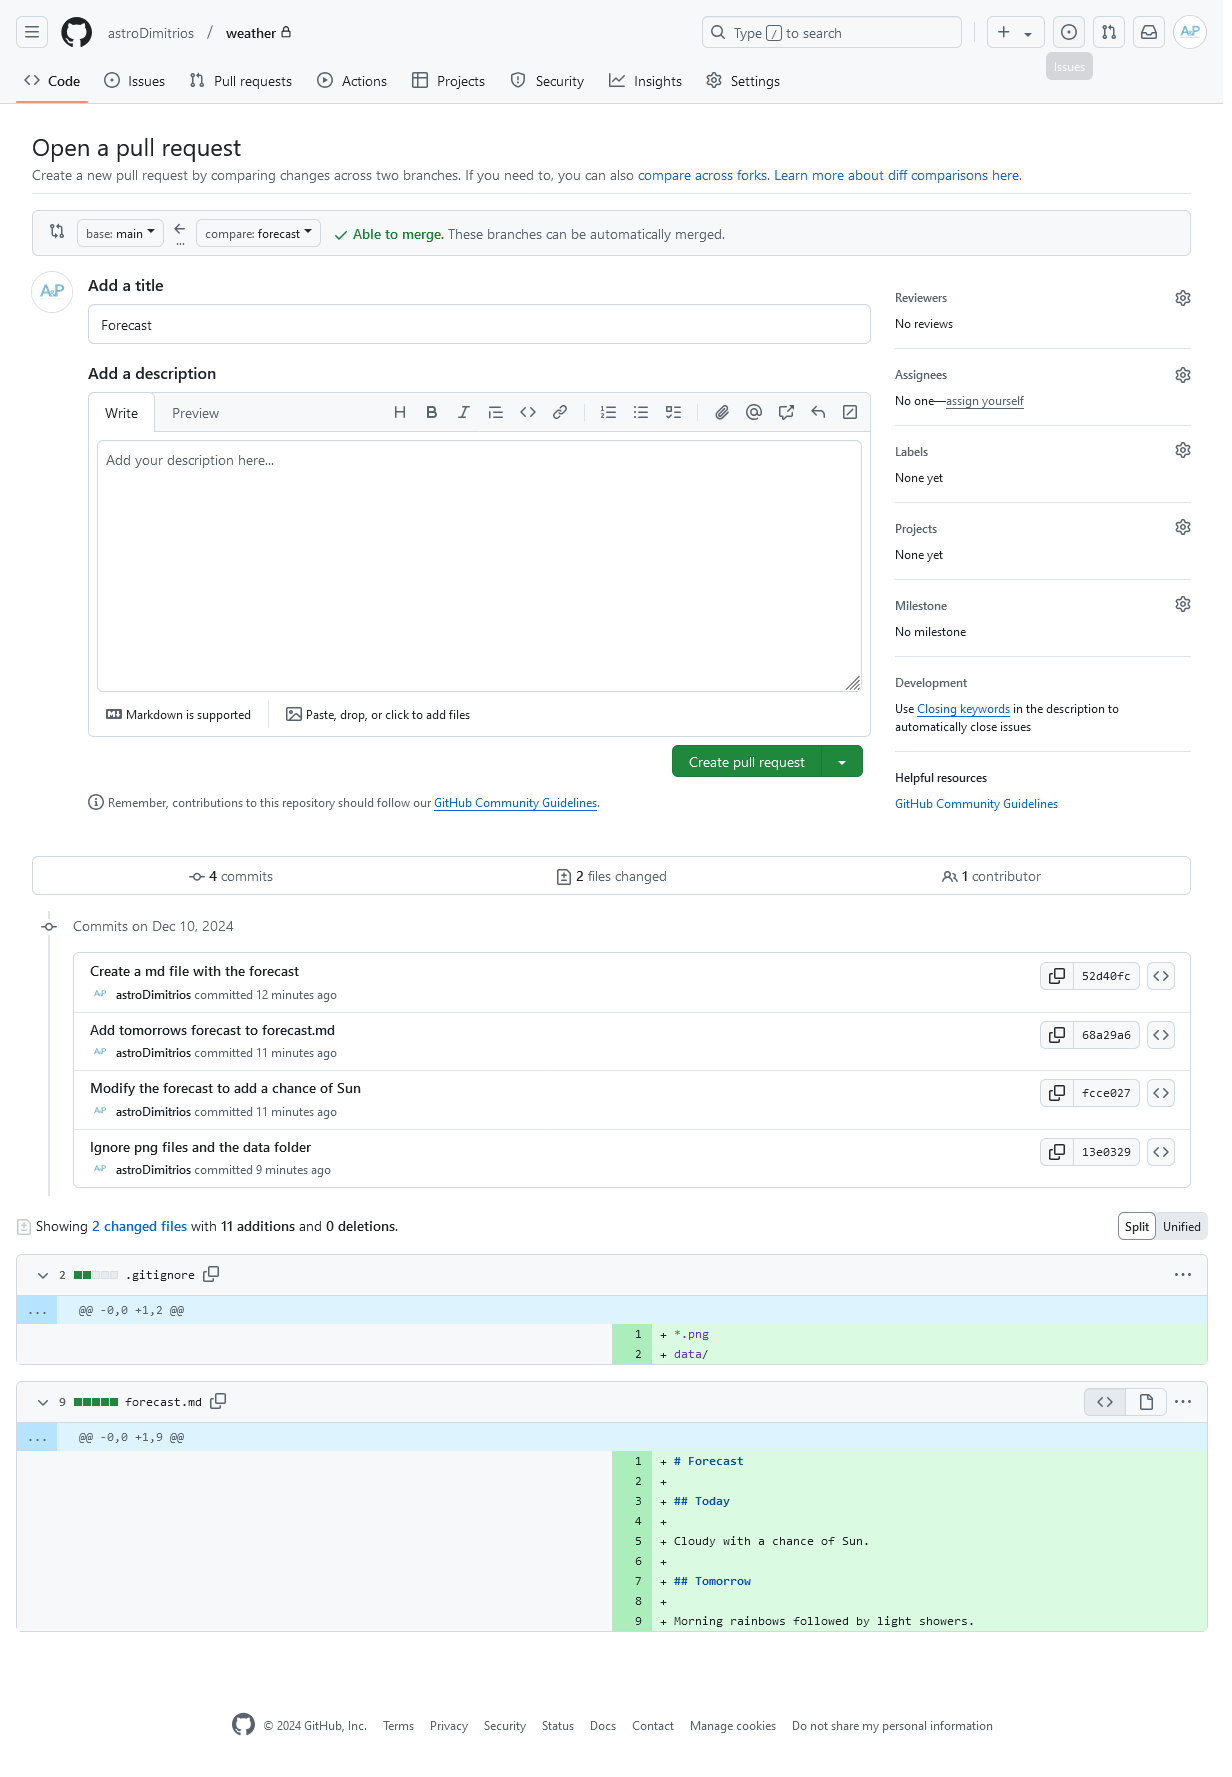
Figure 3
Image 1 of 1: ‘A screenshot showing the dropdown to swap from a normal pull request to a creating a draft pull request.’
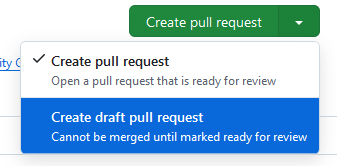
Figure 4
Image 1 of 1: ‘A screenshot showing an open pull request on the weather repo.’
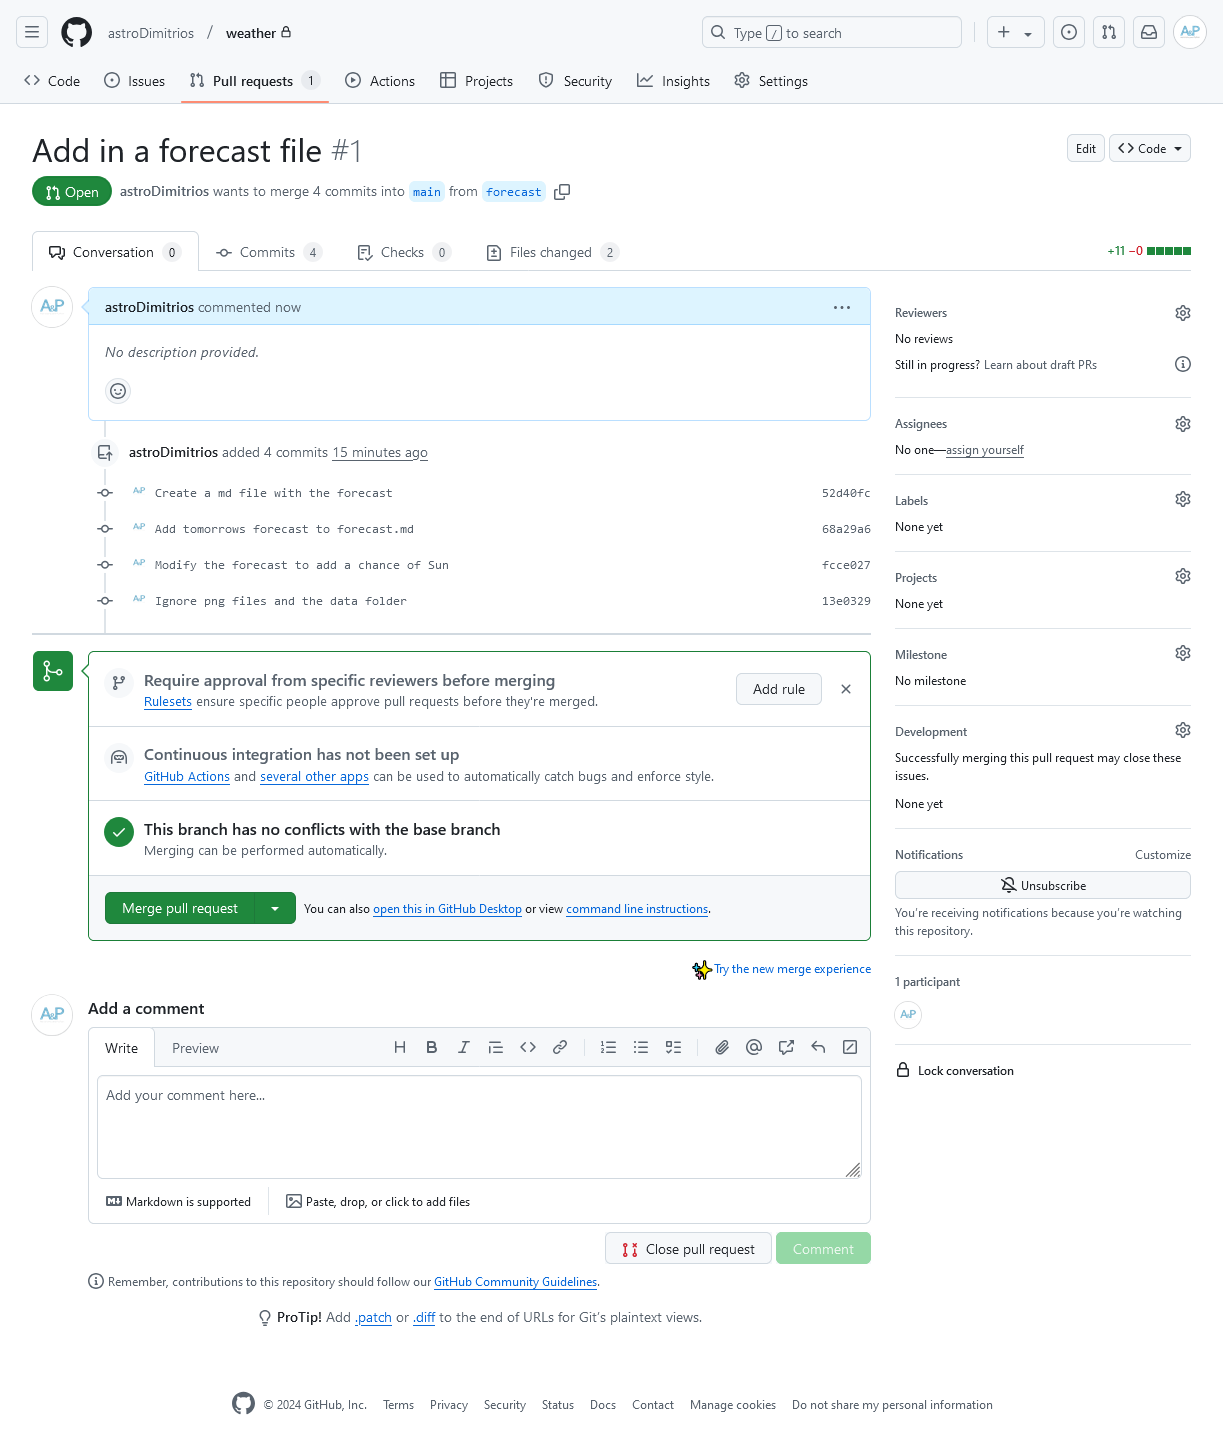
Figure 5
Image 1 of 1: ‘A screenshot showing the creation of a rule to protect the main branch in the repository settings, rulesets page.’
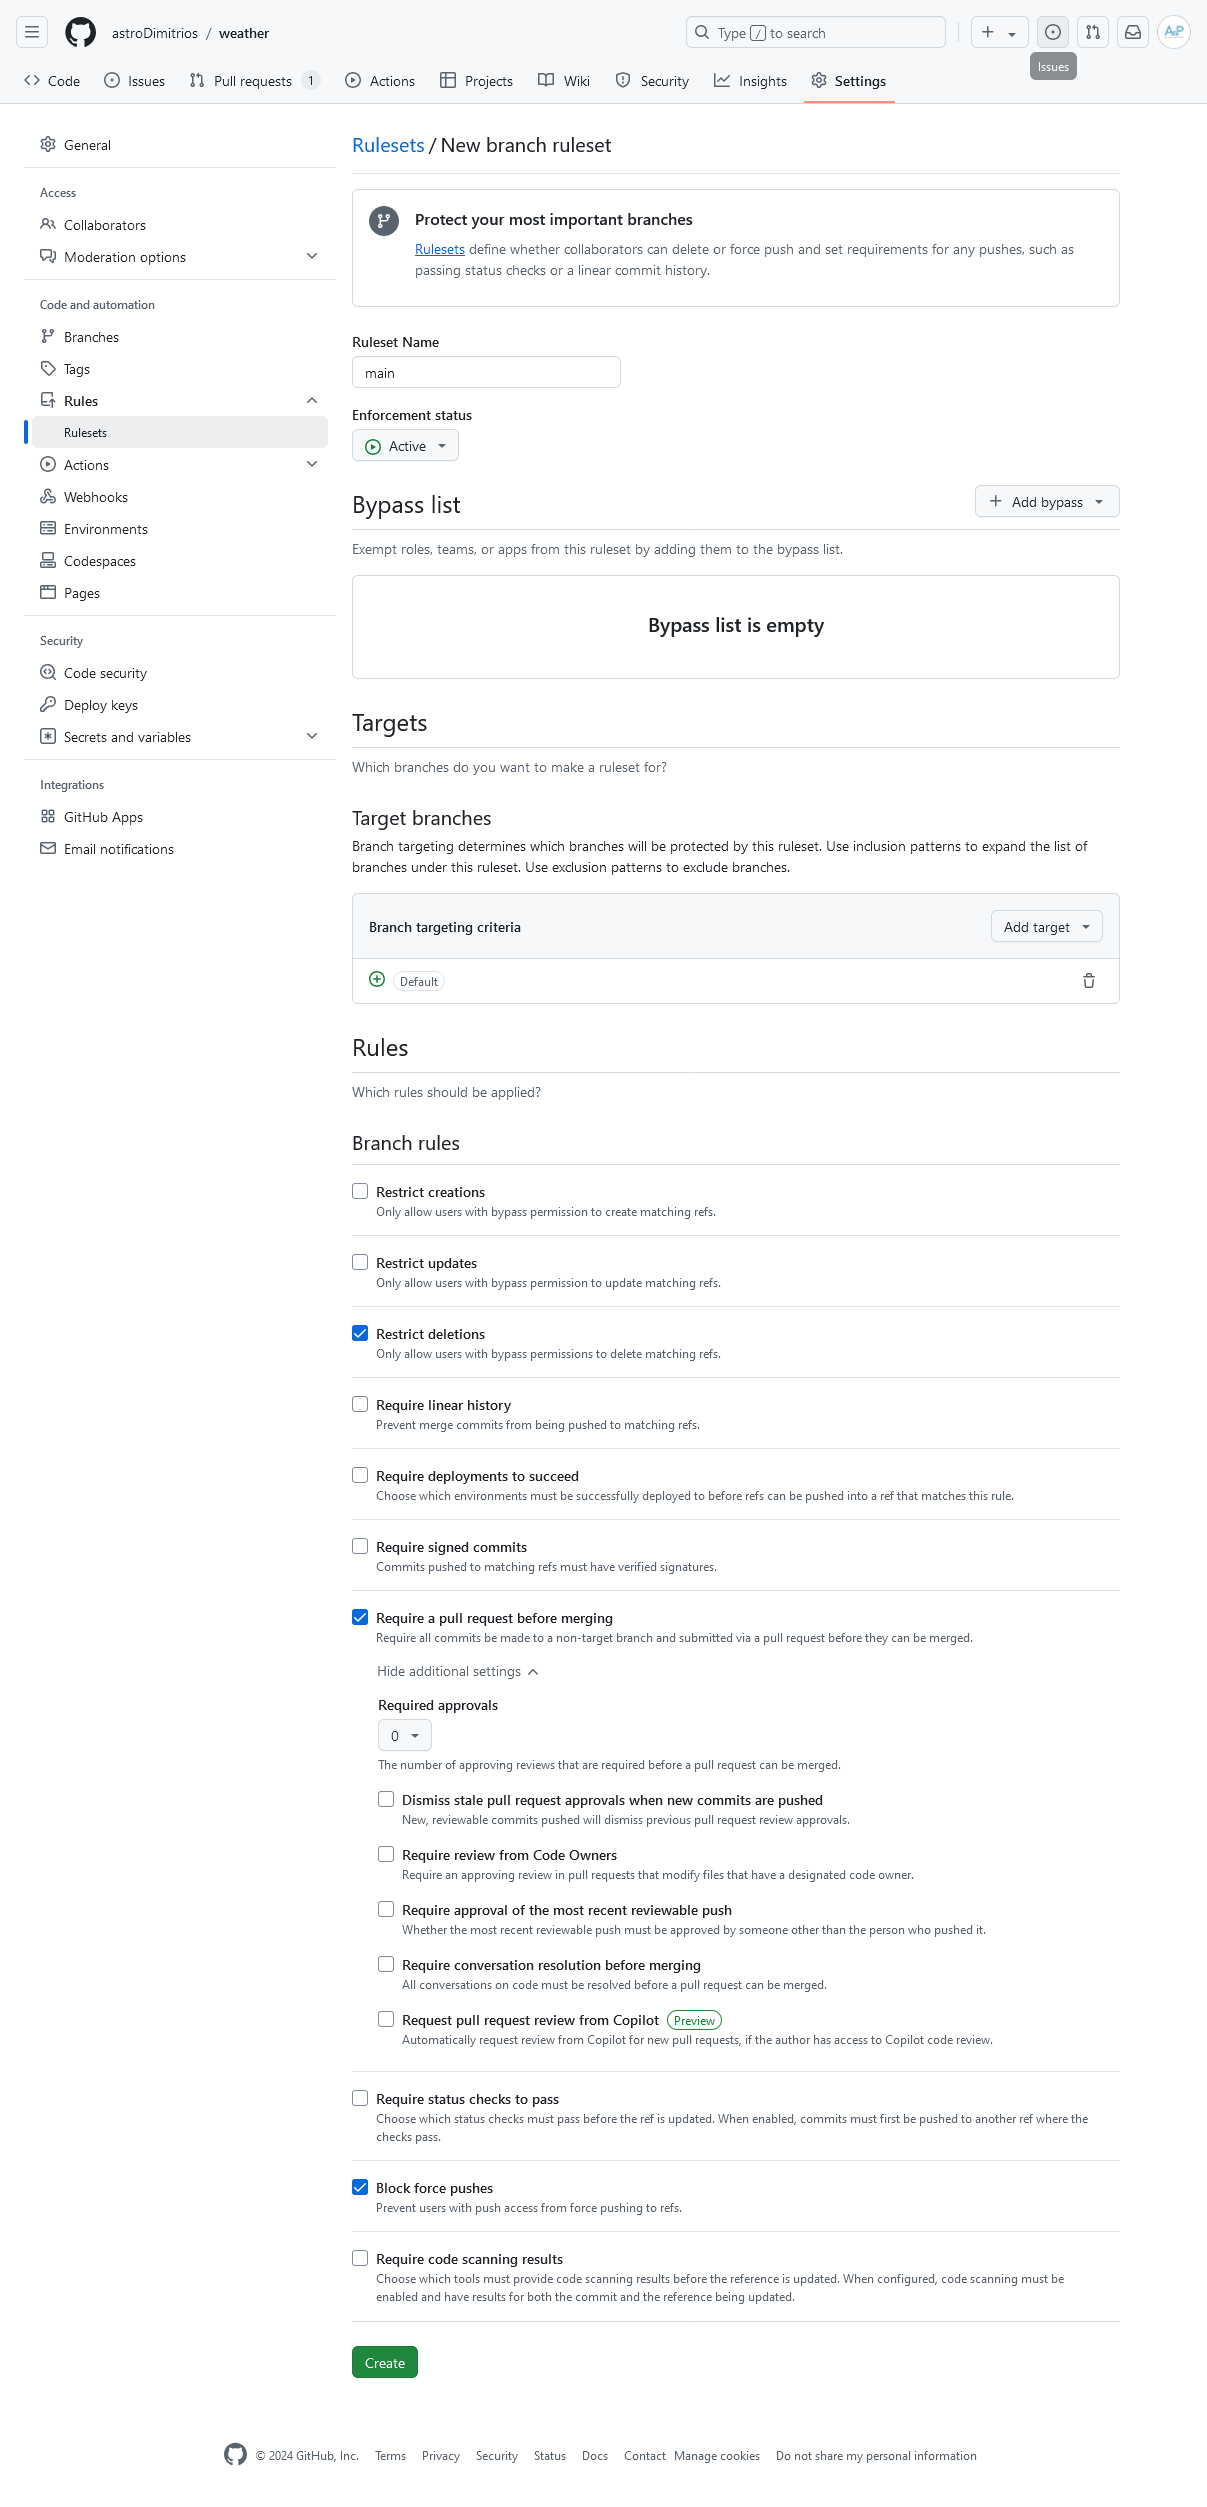
Figure 6
Image 1 of 1: ‘A screenshot showing the dropdown to swap from a normal merge to a squash merge.’
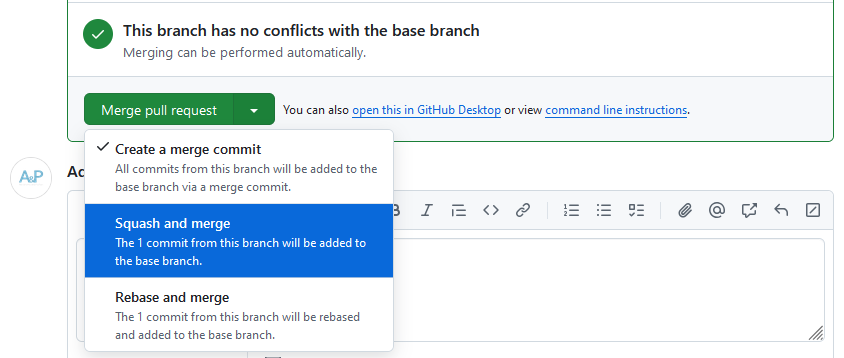
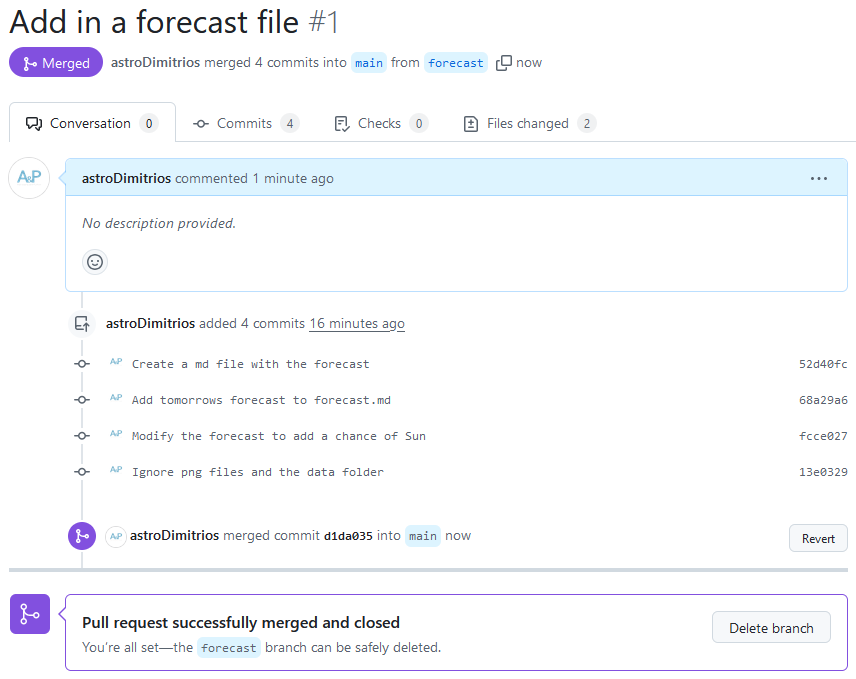
Figure 7
Image 1 of 1: ‘A screenshot showing a closed pull request on the weather repository.’
Configuring GitHub
Figure 1
Image 1 of 1: ‘A screenshot of a users GitHub profile.’

Figure 2
Image 1 of 1: ‘A screenshot of the GitHub weather repo with the Unwatch dropdown expanded.’

Figure 3
Image 1 of 1: ‘A screenshot of the GitHub organisation People settings for an organisation showing how to change your organisation visibility.’
End
Figure 1
Image 1 of 1: ‘A sequence diagram showing the workflow we used during the lesson.’

Open Science
Licensing
Citation
Hosting
Using Git from RStudio
Figure 1
Image 1 of 1: ‘RStudio screenshot showing the file menu dropdown with "New Project..." selected’
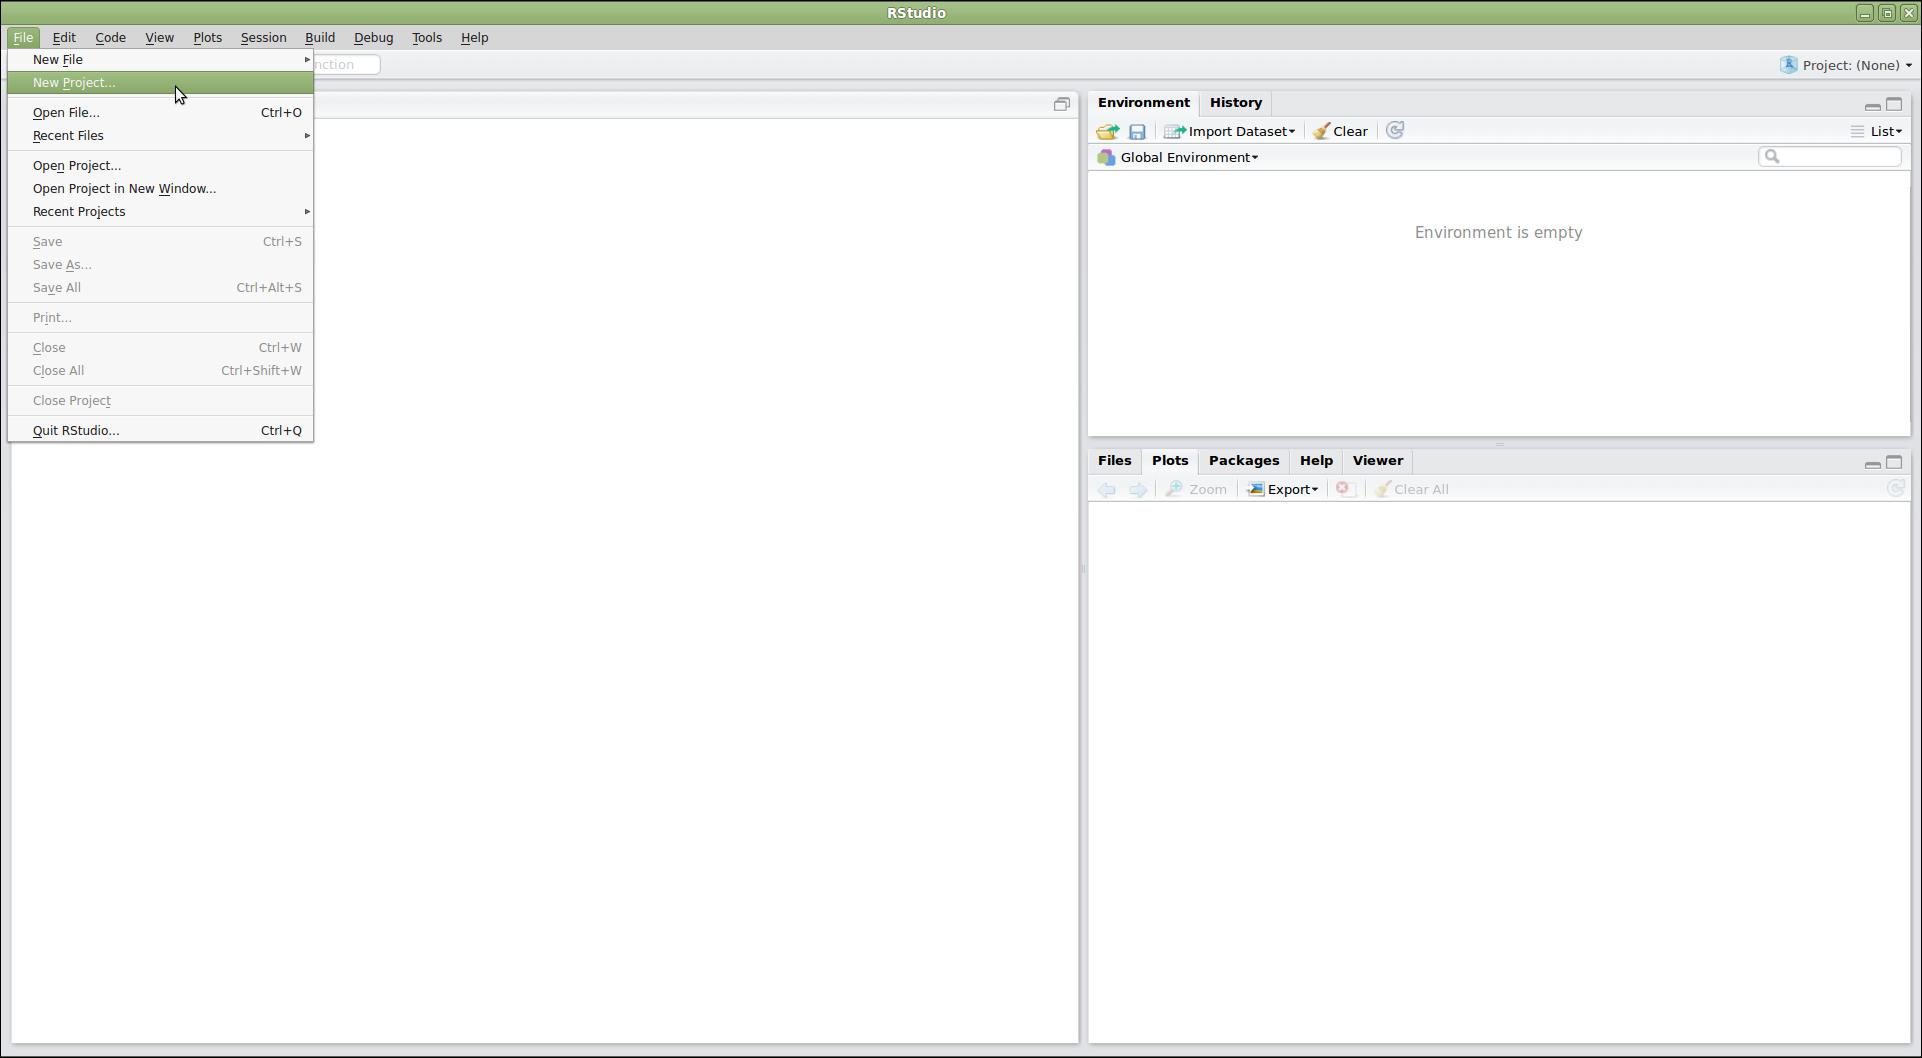
Figure 2
Image 1 of 1: ‘RStudio screenshot showing New Project dialog window with "Create project from existing directory" selected’
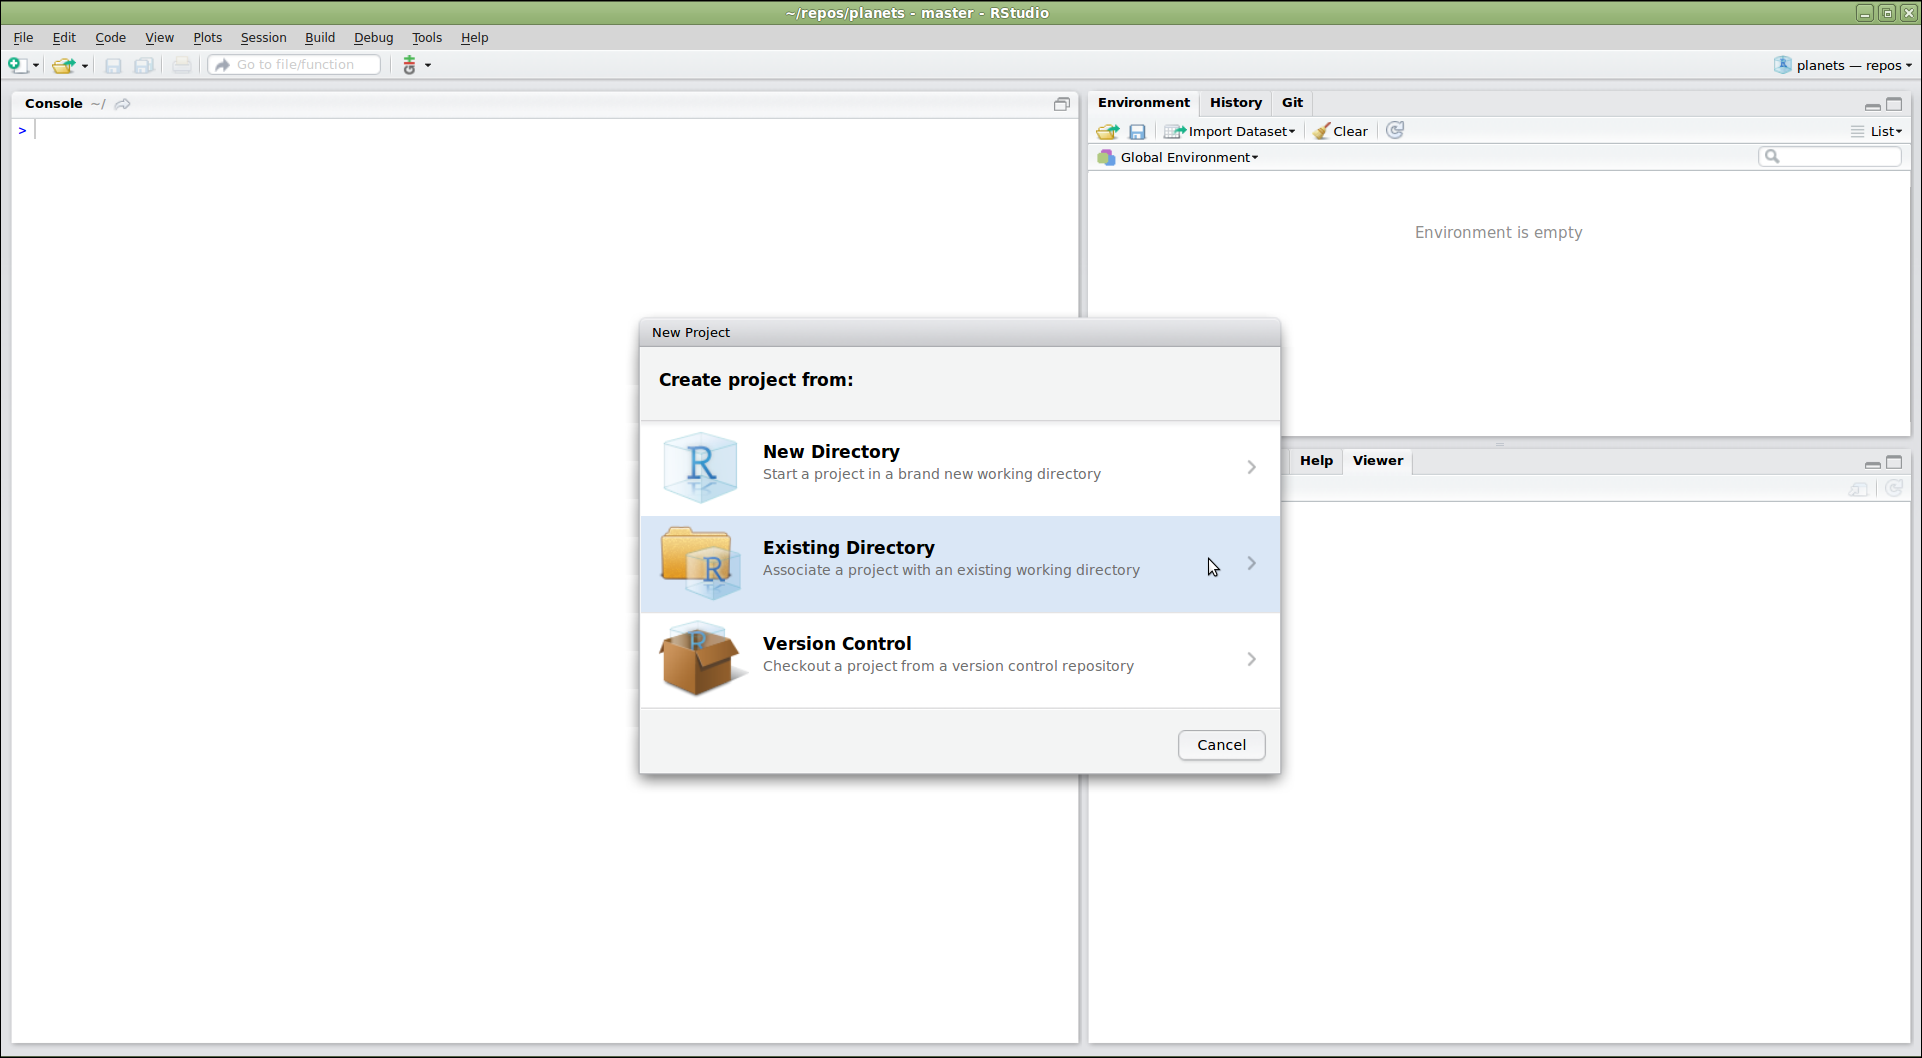
Figure 3
Image 1 of 1: ‘RStudio window showing the "Create Project From Existing Directory" dialog. In the dialog, the project working directory has been set to "~/Desktop/weather"’
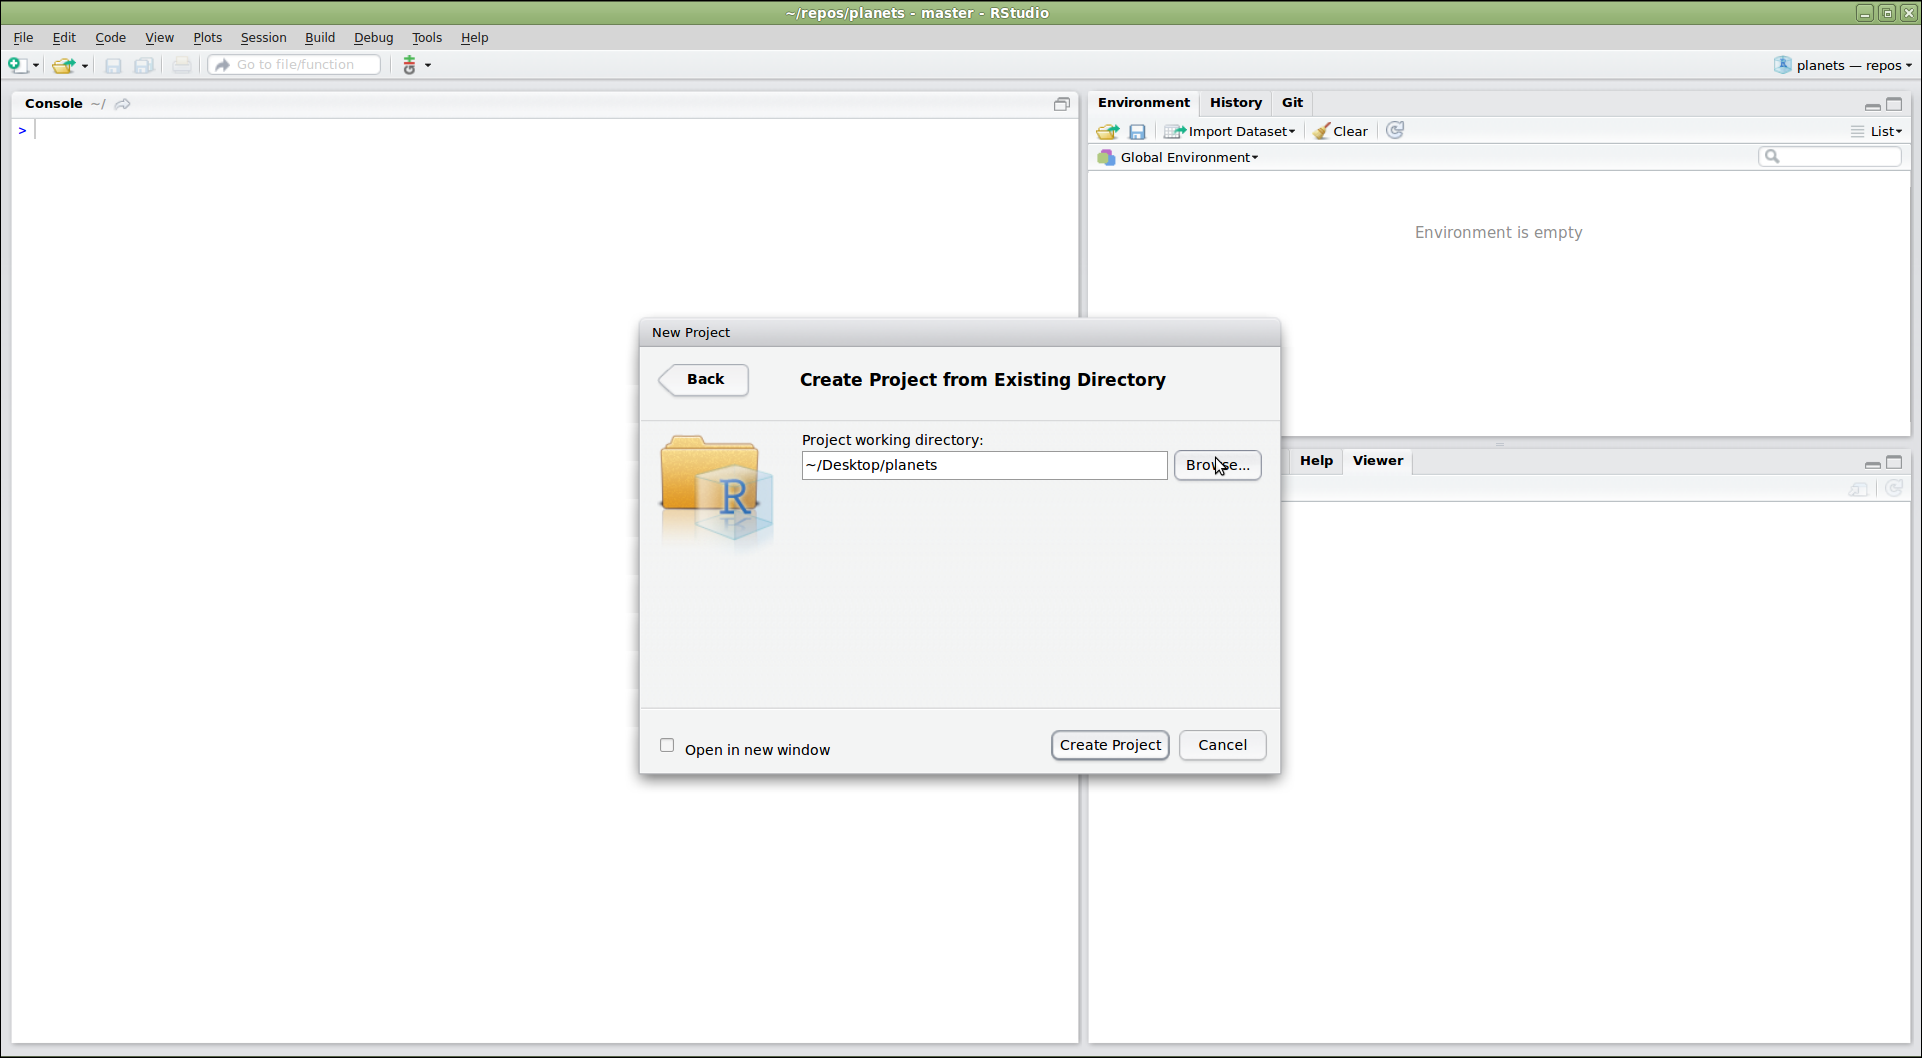
Figure 4
Image 1 of 1: ‘RStudio window after new project is created with large arrow pointing to vertical Git menu bar.’
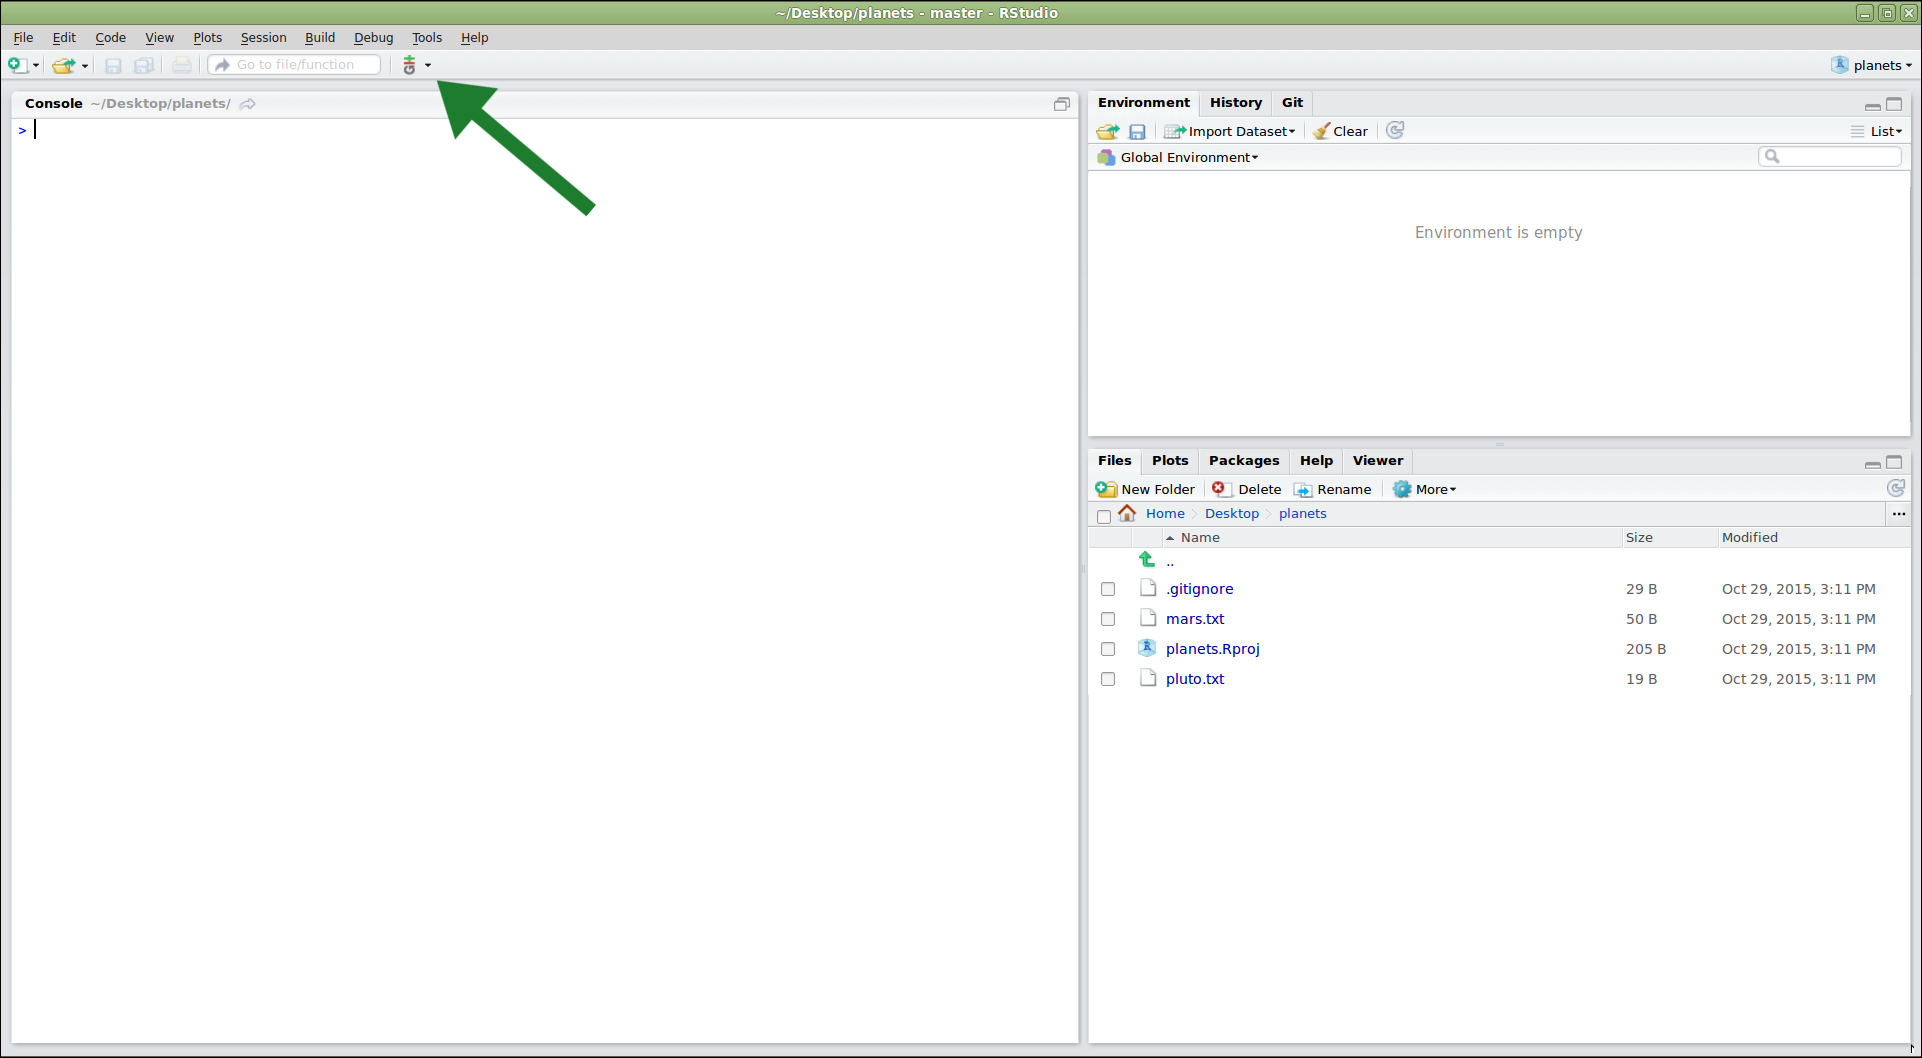
Figure 5
Image 1 of 1: ‘RStudio window demonstrating the use of the editor panel to modify the "pluto.txt" file’
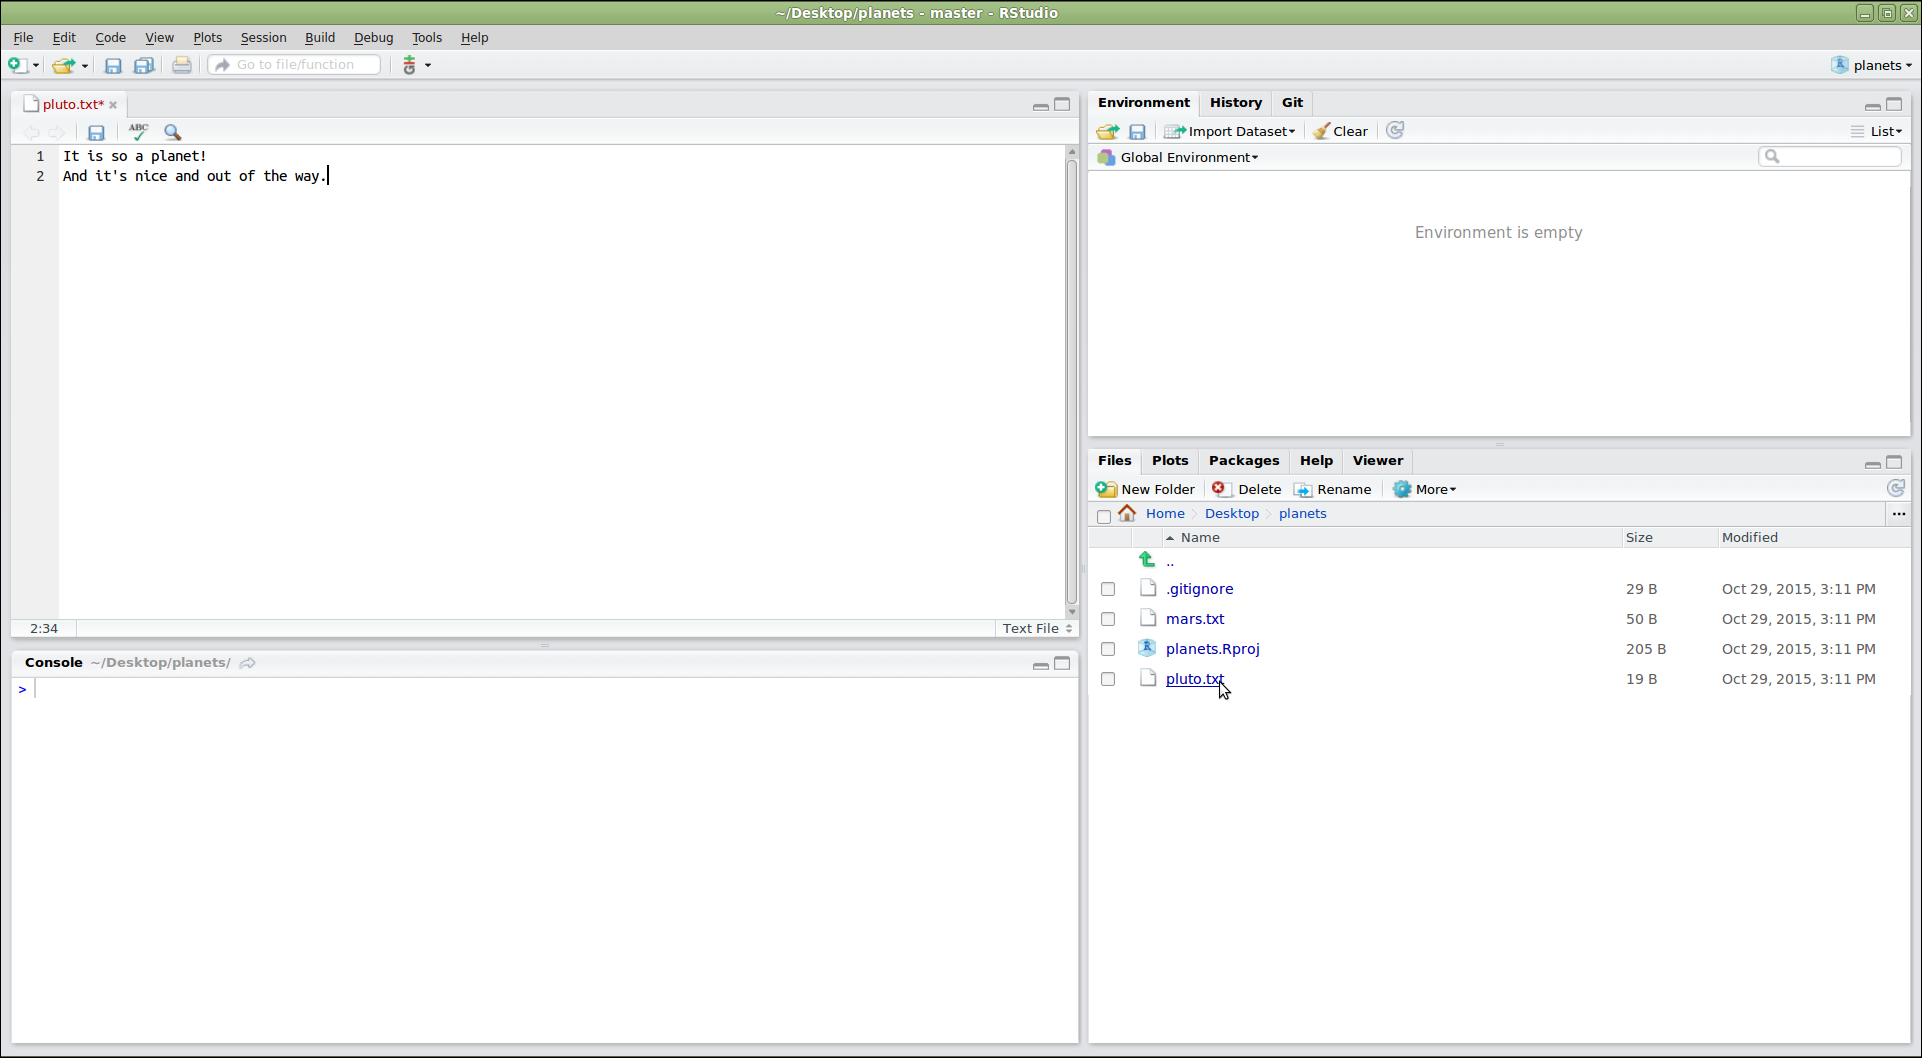
Figure 6
Image 1 of 1: ‘RStudio screenshot showing the Git menu dropdown with the "Commit..." option selected’
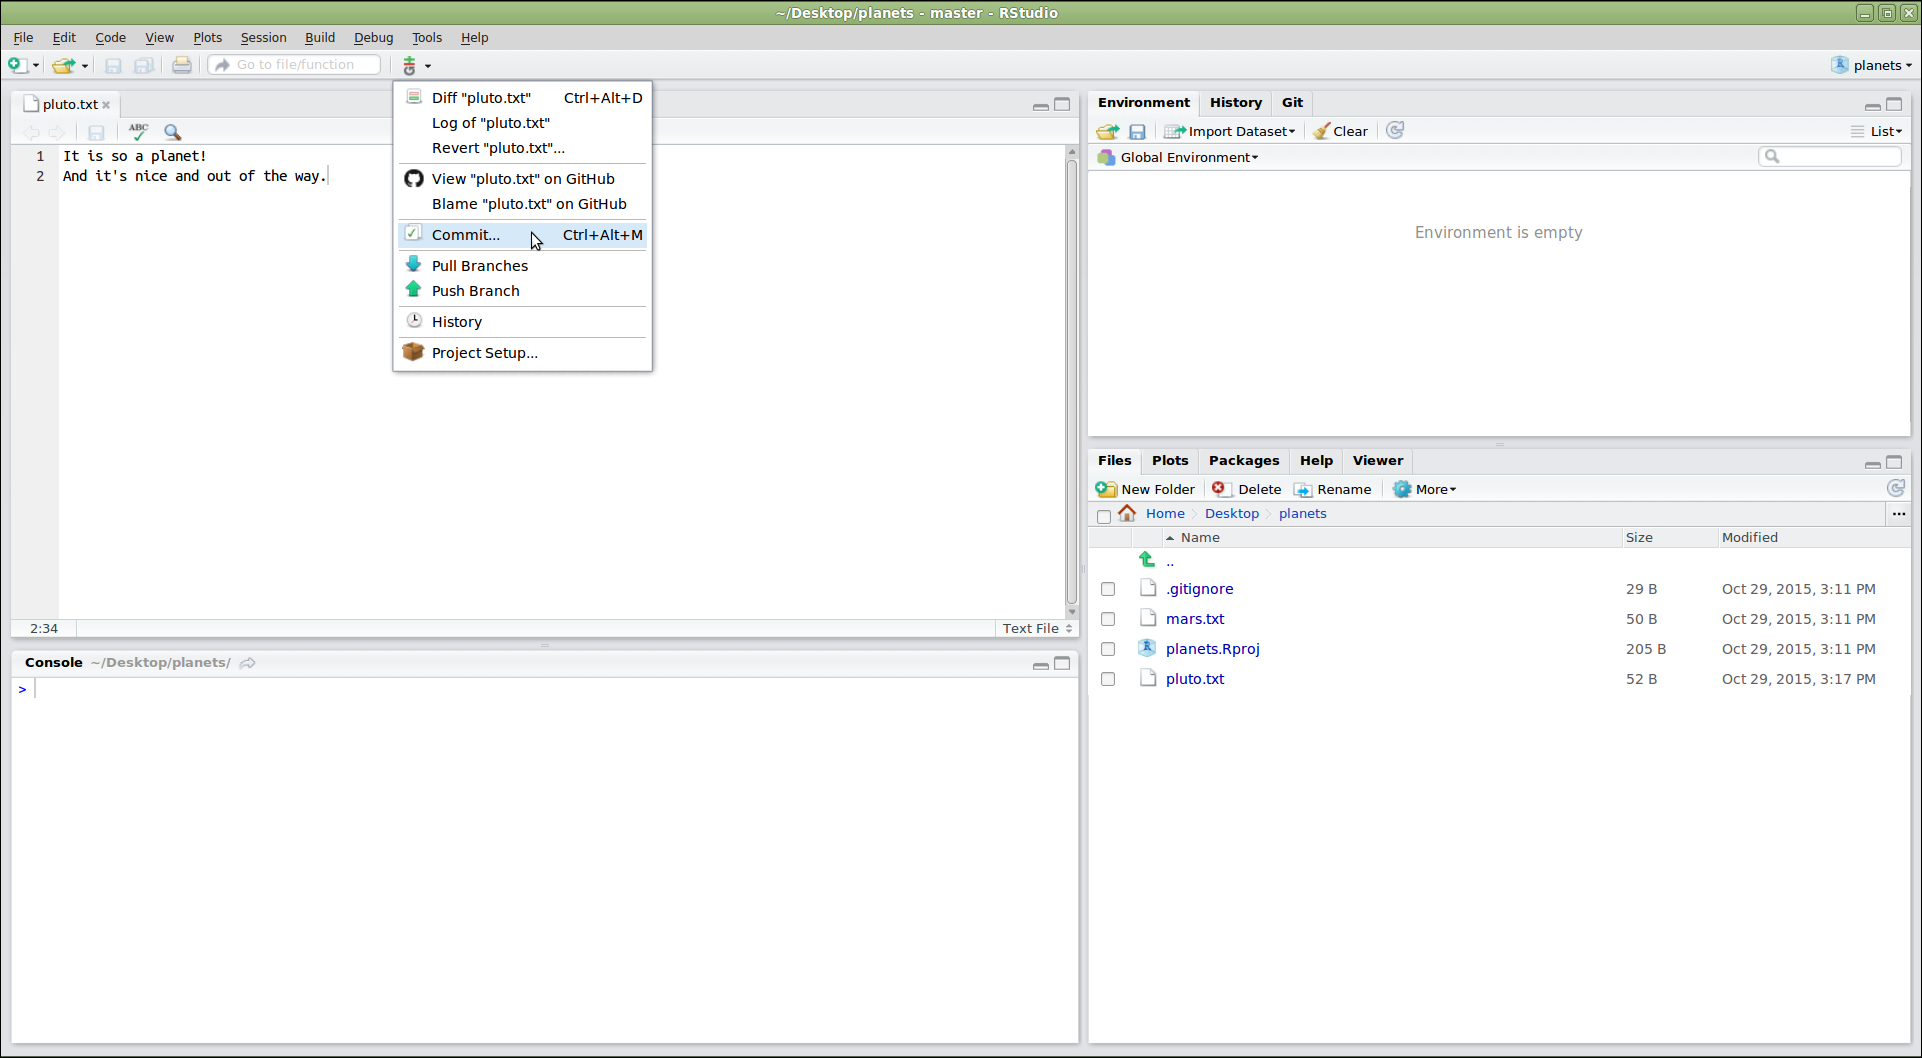
Figure 7
Image 1 of 1: ‘RStudio screenshow showing the "Review Changes" dialog. The top left panel shows the list of files that can be included or excluded from the commit. The top right panel is for writing a commit message. The bottom panel shows information about the currently selected file in the top left panel.’
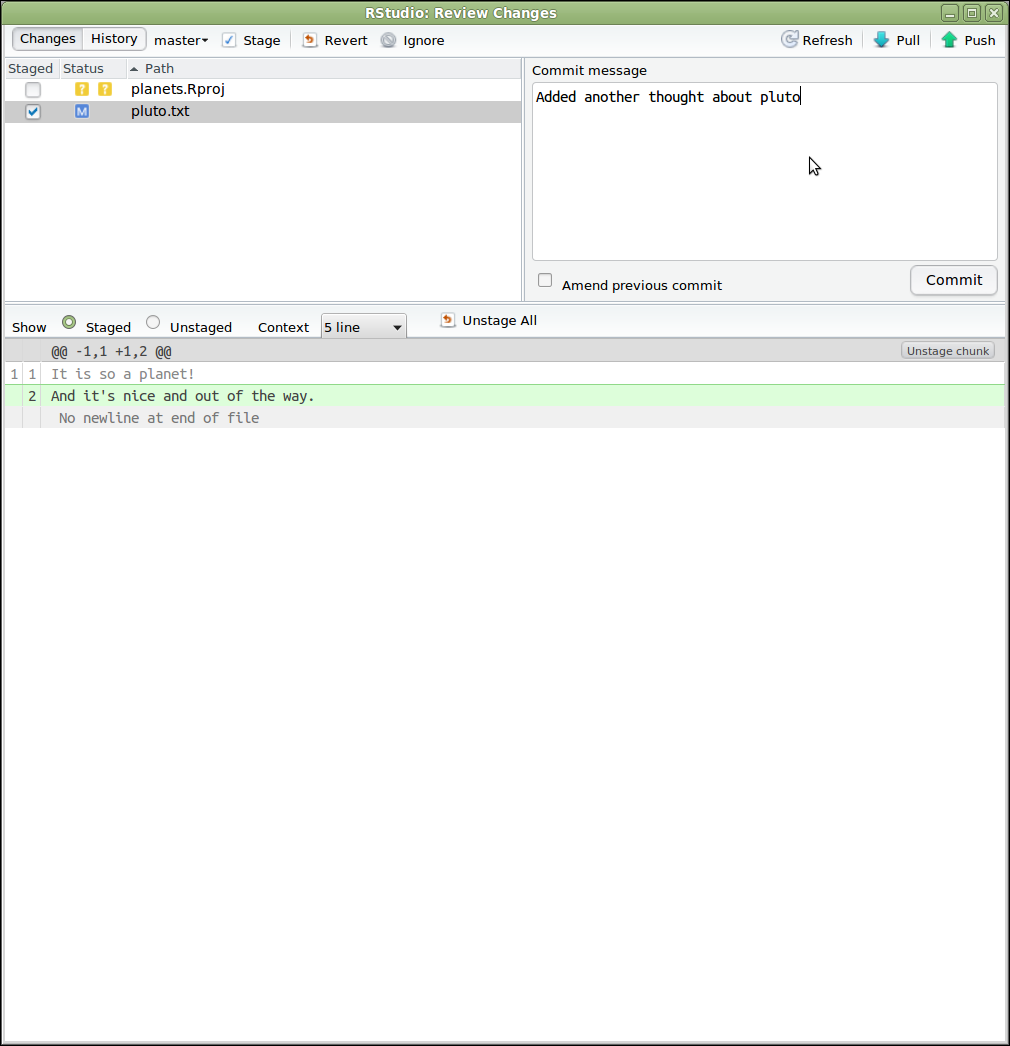
Figure 8
Image 1 of 1: ‘RStudio screenshot showing the git menu dropdown with the "History" option selected’
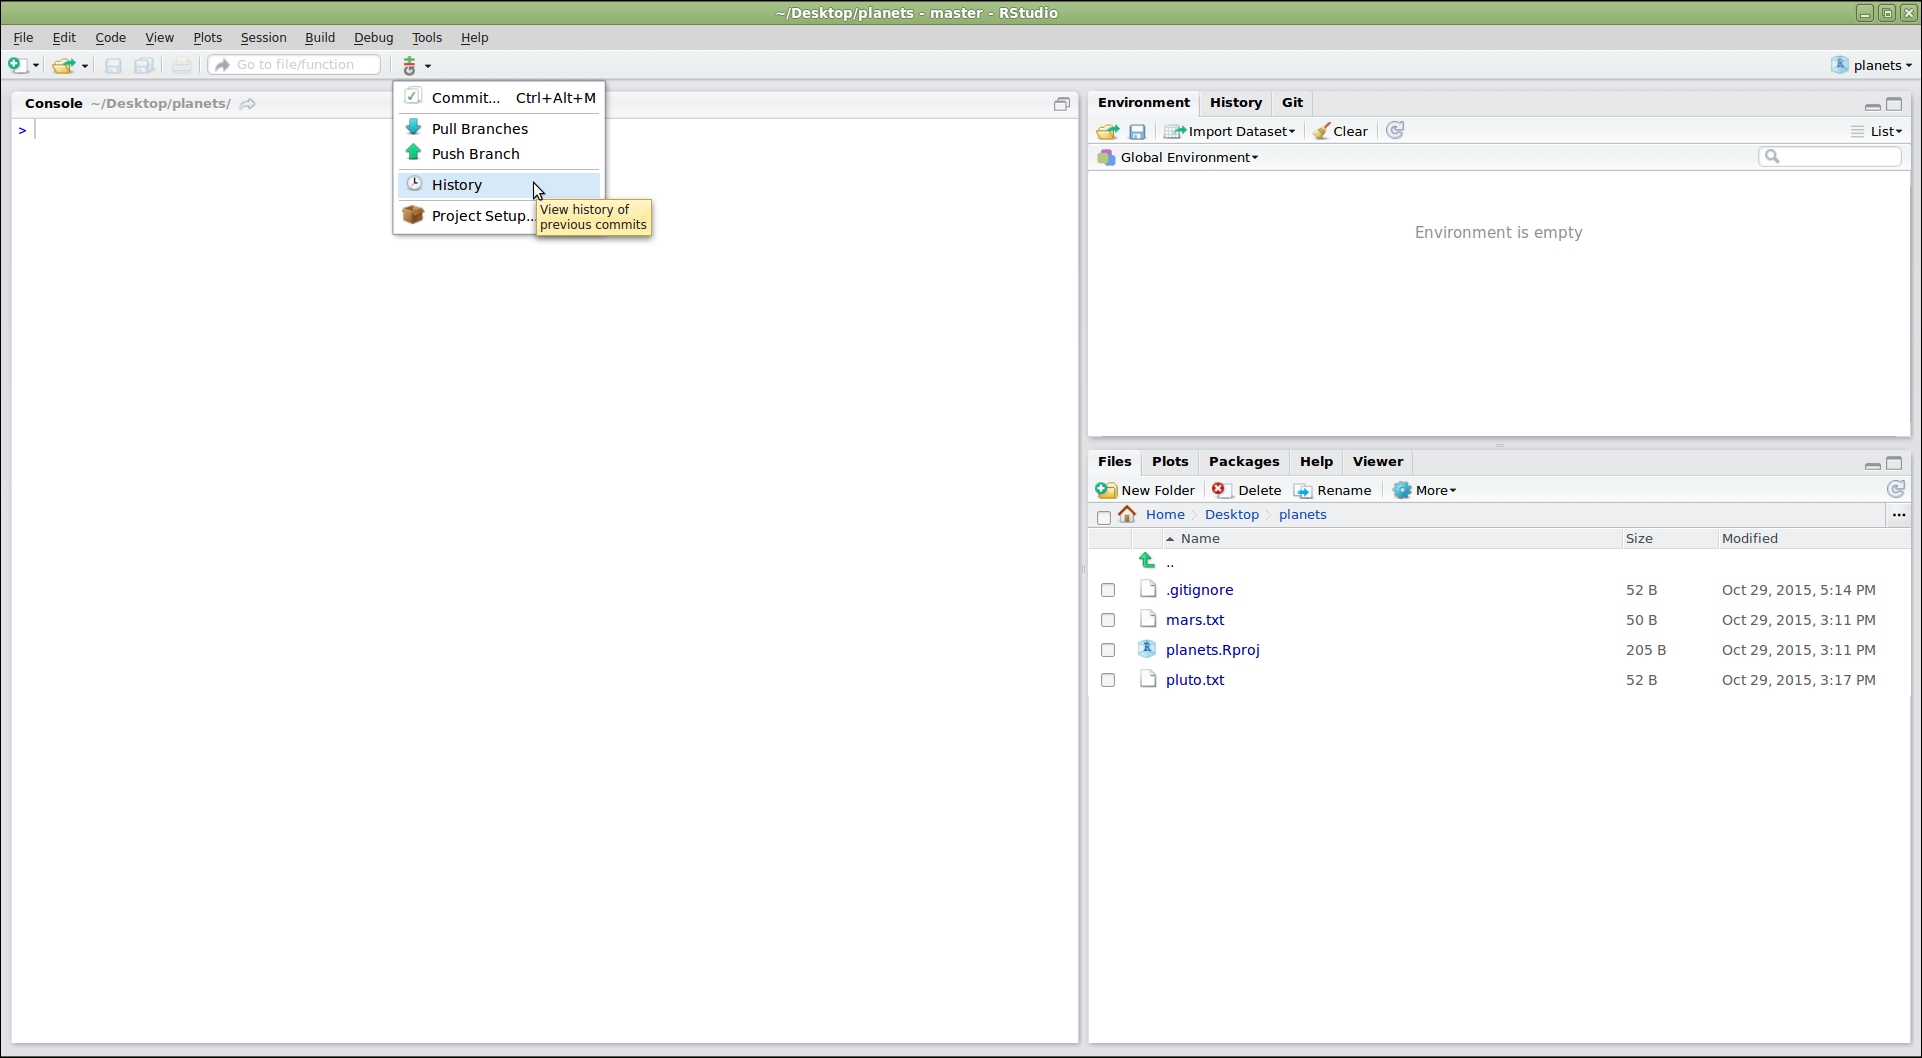
Figure 9
Image 1 of 1: ‘RStudio screenshot showing the "Review Changes" dialog after pressing the "History" button. The top panel lists the commits in the repository, similar to git log. The bottom panel shows the changes included in the commit that has been selected in the top panel.’
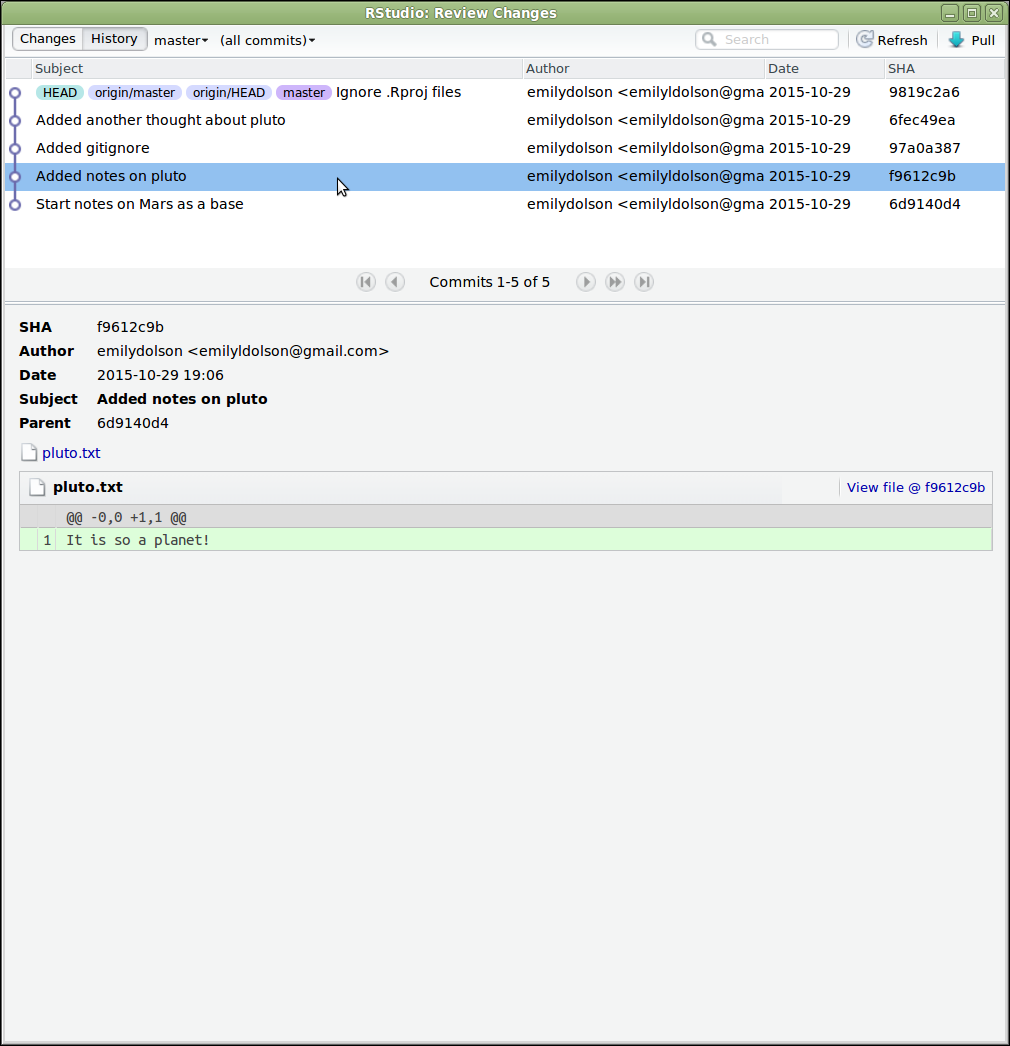
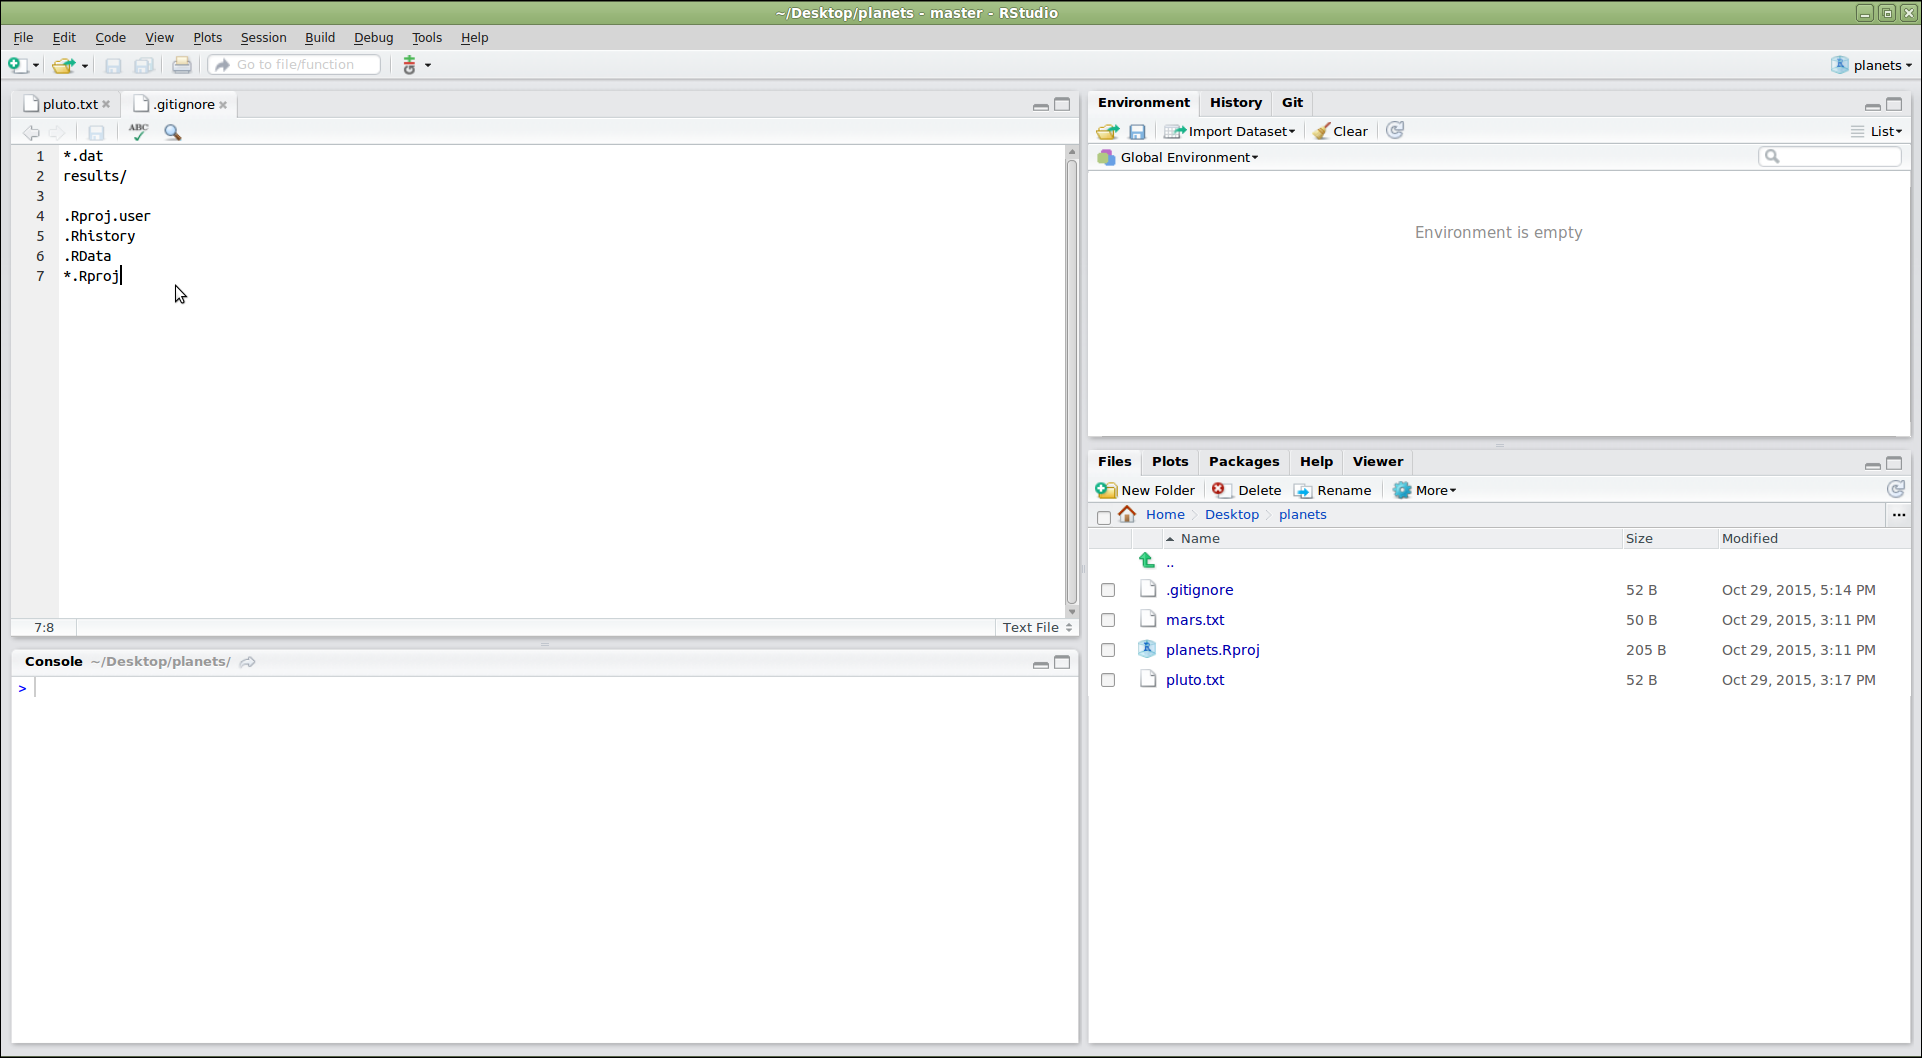
Figure 10
Image 1 of 1: ‘RStudio screenshot showing .gitignore open in the editor pane with the files .Rproj.user, .Rhistory, .RData, and *.Rproj added to the end’